Tag Archives: cooking

Pan Seared Oven Roasted Steak

IMG_6044Most years for special occasions like New Year’s Eve, Valentine’s Day, and birthdays hubby and I splurge on getting a really good steak from an actual butcher shop like Siesel’s or Iowa Meat Farms. Our favorite is to get a Delmonico Rib Eye, which still has the bone in, and is available in a double thick cut. One really giant steak to cook to a perfect medium rare, and share between the two of us. It feels fancy, it’s cheaper than going out to a steak house on a crowded night, and we have a lot of fun cooking together. IMG_0081
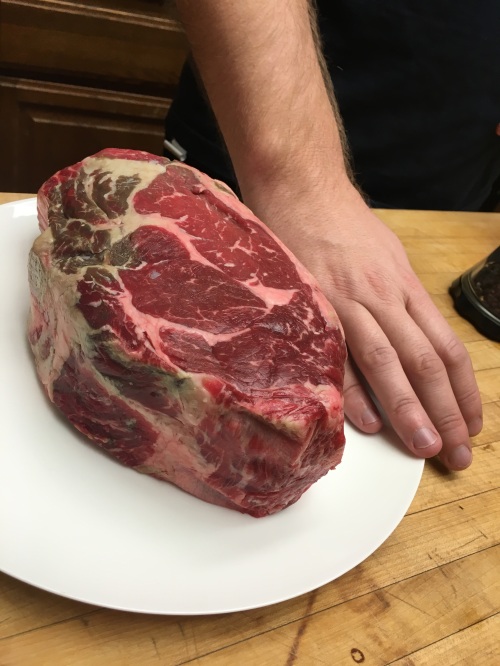
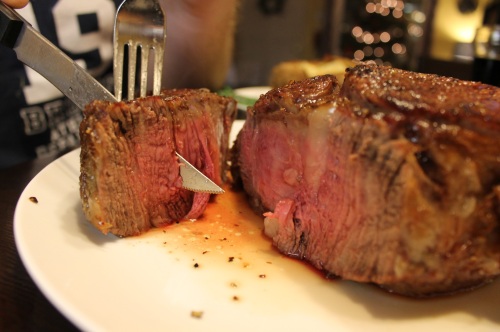
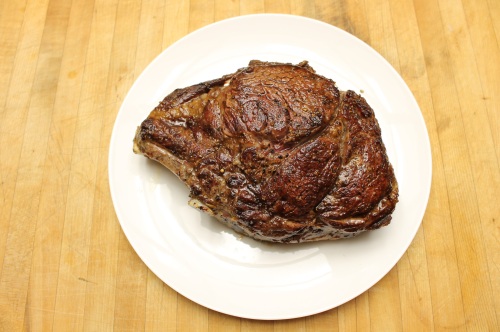
I think we have finally perfected our method for cooking an amazing steak with a crunchy seared exterior, and perfectly tender interior.
IMG_6040

Pan Seared Oven Roasted Steak

  • Servings: 2 (with left overs for steak and eggs)
  • Difficulty: Medium
  • Print

Ingredients:

  • The best steak you can get your hands on
  • Olive oil
  • A well seasoned cast-iron skillet
  • Salt and Pepper

Take your steak out of the fridge at least a half hour before cooking to bring to room temperature. Rub with olive oil, and generously season the steak on all sides with salt and pepper.

Preheat your oven to 500 degrees F.

Heat a well-seasoned cast iron skillet over high heat. Sear your steak on all sides. You may need to hold it upright with tongs to brown the edges. For our double thick steak, we seared it for about 45 seconds per side.

Once the steak is browned on all sides, slide it in the cast iron skillet into your oven. Cook the steak for 2-7 minutes on each side, depending on thickness. (2 minutes per side for a medium rare 1 1/2 inch steak, 7 minutes per side for a 3 inch thick steak)

Let steak rest for about ten minutes before slicing it.


Leave a comment

Filed under Cooking Project, Dinner, Recipes

Stuffed tomatoes

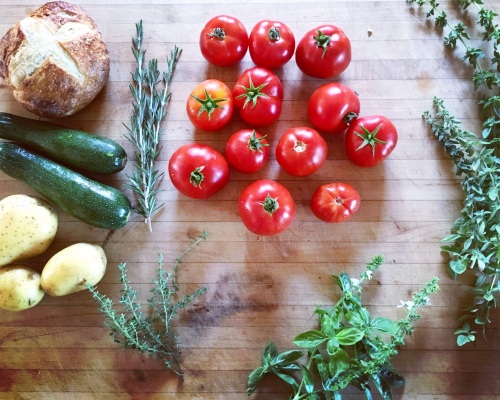
IMG_2617

I love this time of year. It’s usually when our backyard garden is at it’s peak, and my menu planning is guided by a Sunday afternoon harvest. We had a late and rocky start to planting this year due to some unexpected SDGE projects in our yard, and I was worried that we wouldn’t have the success we’ve had in previous summers. Thankfully we’ve got a very powerful “volunteer” tomato that sprouted and has completely taken over a corner. It’s been giving us a handful of tomatoes every week, and this week we got an abundance!

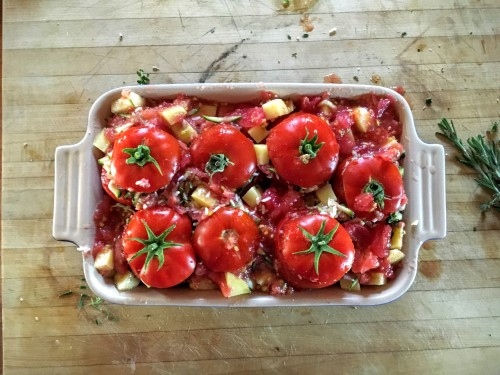
I saw a video online recently for stuffed tomatoes, and was reminded of making stuffed tomatoes in a cooking class in Italy during my study abroad program in 2005. Unfortunately I couldn’t get my hands on that recipe, but between perusing The Silver Spoon and a few online recipes, here’s what we landed on: Plump hollowed out tomatoes stuffed with zucchini, rice, tomatoes and herbs, surrounded by diced tomatoes.

IMG_2633

Stuffed Tomatoes

  • Servings: 4
  • Difficulty: Medium
  • Print

7 tomatoes
1/2 yellow onionIMG_2635 3 garlic cloves
1 zucchini
1/4 cup cooked rice
1/2 lemon
2 small yukon gold potatoes
olive oil
salt and pepper
parmesan cheese optional for finishing
an abundance of italian herbs. I used rosemary, oregano, thyme and basil

Preheat the oven to 400 degrees.

Slice the tops off of the tomatoes and reserve. Using a spoon, hollow out the inside of the tomato, and scoop the flesh into a bowl. If desired, turn the tomatoes upside down and let them drain. I’m not entirely sure of the benefits of this, but I do feel like the sides of my tomatoes held up a bit better. Pulse onion, garlic, 1 tsp olive oil and a pinch salt in a food processor or blender, and dump into a large bowl. Separate tomato flesh chunks from the juice and pulse in the food processor, add to large bowl. Shred zucchini in food processor or with a grater, and add to large bowl. Add rice, lemon juice, a generous pinch of salt, pepper, and chopped herbs to everything in the large bowl. Place the tomatoes into an oiled baking dish. Using a fork to slightly drain the mixture, stuff the hollowed out tomatoes with the zucchini rice mixture.

Dice up the potatoes and toss with salt, pepper, olive oil and herbs. Stuff potatoes all around tomatoes. Pour the remaining tomato juice and any juices from the stuffing mixture over the potatoes.

Bake at 400 degrees for 20 minutes, turn the heat down to 385 degrees and bake for an additional 20 minutes. If desired, finish with a sprinkling of Parmesan cheese before the last 5 minutes of baking.

Serve with a small green salad and some crusty bread, and a nice glass of red wine. Bon appetit!

2 Comments

Filed under cooking, Cooking Project, Dinner, Recipes

Lemon Orange Poppyseed Muffins

IMG_2288

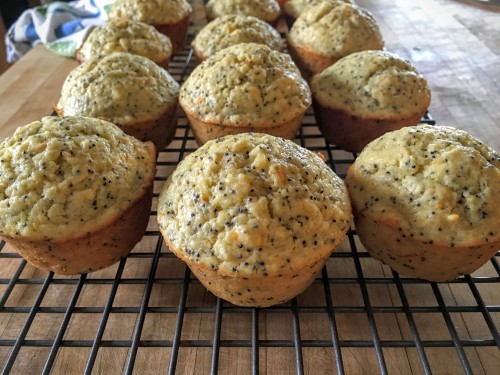
As I’ve mentioned before, Sunday mornings in our house are often for leisurely breakfasts, usually involving a baking project of some kind. This past weekend I really wanted to make some buttermilk muffins as a way to use up some of the buttermilk in my fridge.

IMG_2273

I found myself lacking all of things I usually put into muffins: blueberries (frozen or fresh), other berries, dried fruits, etc. It must be time to go shopping!

IMG_2277
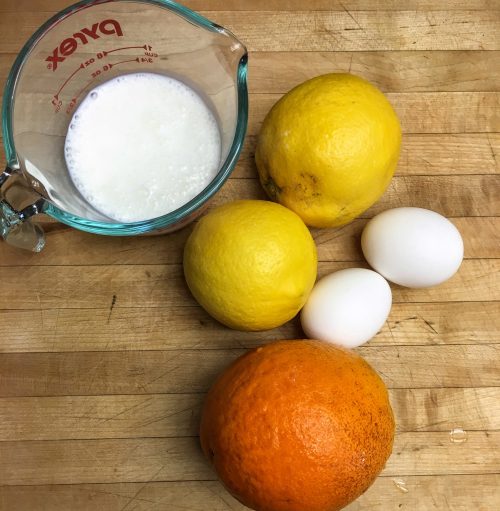
What we did have is a nice supply of meyer lemons and oranges, and some poppyseeds from the spice cupboard. These muffins ended up being so deliciously fresh, with a nice tartness from the citrus and buttermilk. I’m sure I will make these again, more intentionally this time!

IMG_2290

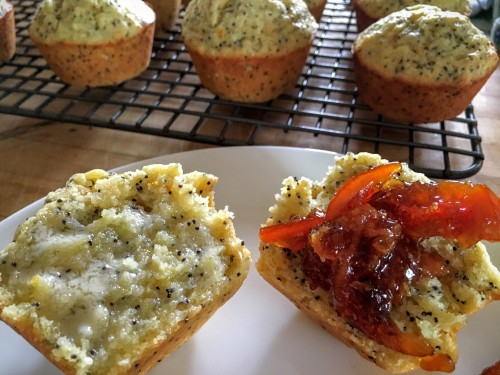
These muffins ended up being a perfect vehicle for our Orange Vanilla Marmalade.

Lemon Orange Poppyseed Muffins

  • Servings: 12
  • Difficulty: Medium
  • Print

Recipe adapted from Sally’s Baking Addiction

INGREDIENTS

2 and 1/3 cups all-purpose flour
1/2 cup granulated sugar
1/4 cup packed light brown sugar
3 Tablespoons poppy seeds
2 teaspoons baking powder
1/4 teaspoon baking soda
1/2 teaspoon salt
1/2 cup salted butter, melted
juice and zest of 2 medium lemons
juice and zest of 1 orange
2 large eggs, at room temperature
1/2 cup buttermilk
1 teaspoon vanilla extract

Directions:

Preheat oven to 425°F. Spray 12-count muffin pan with nonstick spray. Set aside.
In a large bowl, whisk the flour, granulated sugar, brown sugar, poppy seeds, baking powder, baking soda, and salt together until thoroughly mixed. Set aside.
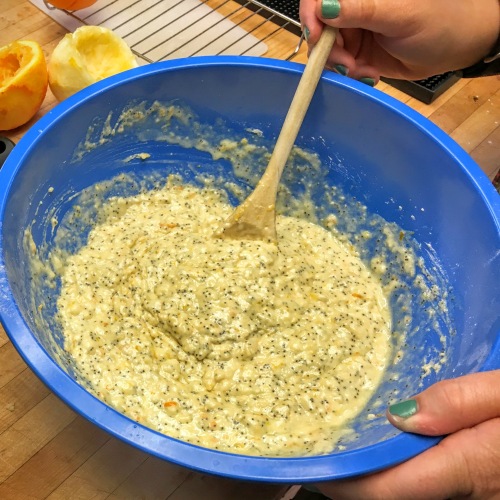
In a medium bowl, whisk the melted butter, lemon juice, lemon zest, orange juice, and orange zest together until combined. (Our citrus was very juicy, so we only used the juice of 1 lemon and 1/2 orange) Add the eggs, one at a time, whisking after each addition. Whisk in the buttermilk and vanilla. Pour the wet ingredients into the dry ingredients and gently mix together until no pockets of flour remain. Do not overmix. The batter is extremely thick.
Spoon the thick batter into the muffin tins, filling them all the way to the top, about 1/4 cup of batter in each. Bake for 5 minutes at 425°F. Keeping the muffins in the oven, reduce oven temperature to 375°F  and continue to bake for 10-13 minutes longer until tops are lightly golden. A toothpick inserted in the center should come out clean. Allow to cool for 10 minutes.

1 Comment

Filed under baking, Breakfast, Recipes

Belgian Waffles

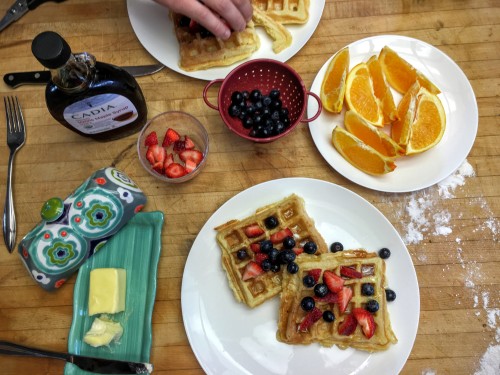
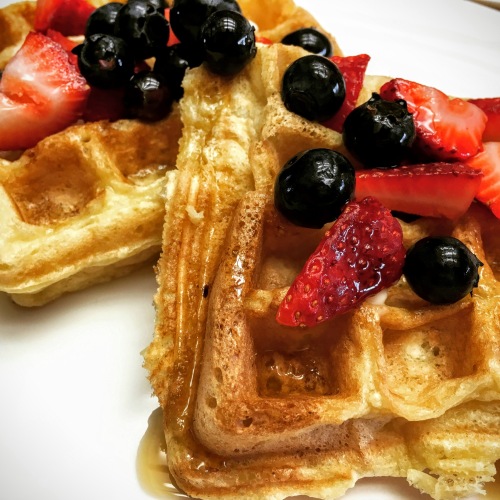
IMG_2038One of our favorite weekend traditions is to have one sleep in day, with a fancy breakfast, home made lattes, and lounge on the couch for an episode of Scandal while we enjoy. A top contender for lazy Sunday breakfast is Belgian Waffles. Our favorite recipe is actually a make ahead yeasted waffle recipe from Ina Garten that I hope to share later, but alas we aren’t always that prepared. This past weekend we tried Emeril Lagasse’s recipe for Belgian Waffles and loved it. You separate the eggs and beat the whites, which really helps to make the batter light and fluffy. A few tips: melt your butter ahead of time and let it cool, and let the eggs and milk come to room temperature. This will help when adding the butter to your liquids if everything is closer to the same temperature.

IMG_2042What are some of your favorite lazy, loungey weekend breakfast recipes?

Belgian Waffles

  • Servings: 4
  • Difficulty: Medium
  • Print

Recipe from Emeril Lagasse

INGREDIENTS
2 cups cake flour
2 teaspoons baking powder
1/2 teaspoon salt
4 large eggs, separated
2 tablespoons sugar
1/2 teaspoon vanilla extract
4 tablespoons unsalted butter, melted
2 cups milk
non-stick cooking spray

DIRECTIONS
Preheat the waffle iron according to the manufacturer’s instructions. In 1 medium bowl sift together flour, baking powder, and salt. Set aside. In a second bowl use the wooden spoon to beat together the egg yolks and sugar until sugar is completely dissolved and eggs have turned a pale yellow. Add the vanilla extract, melted butter, and milk to the eggs and whisk to combine. Combine the liquid mixture with the flour mixture and whisk just until blended. Do not over mix. In third bowl, beat the egg whites with an electric mixer until soft peaks form, about 1 minute. Using the rubber spatula, gently fold the egg whites into the waffle batter. Do not overmix! Coat the waffle iron with non-stick cooking spray and pour enough batter in iron to just cover waffle grid. Close and cook as per manufacturer’s instructions until golden brown, about 2 to 3 minutes. Serve immediately.
2 Comments

Filed under Breakfast, cooking, Recipes

Making Sushi with Sushi on a Roll

Recently one of my friends organized a cooking class for her birthday at Sushi on a Roll. We had such a blast talking with Chef Jeff about his love of sushi, and learning how to roll our own rolls. We got to make California Krab Rolls and Spicy Tuna hand rolls.DSC_0866First thing is to start with good rice. Did you know that sushi means rice?

  • Wash your sushi rice until the water runs clear to pull out all of the excess starch
  • Cook your sushi rice with a little bit less water than you normally use to cook rice, since the rice has already absorbed some water from the rinsing process. This will be different for everyone, depending on your rice, your water, and your rice cooker so experiment to find out what works best for your set up.
  • Cool the rice. If you’ve ever noticed the giant bamboo bowl behind the sushi counter at your favorite restaurant, that’s where they cool the rice by periodically fanning it and stirring it to speed up the cooling process. It will take about 2 hours to cool.
  • Add vinegar to the rice to keep it from attracting any bacteria. Use about 4 Tb of vinegar to 5 c of rice.

Sushi Roll:

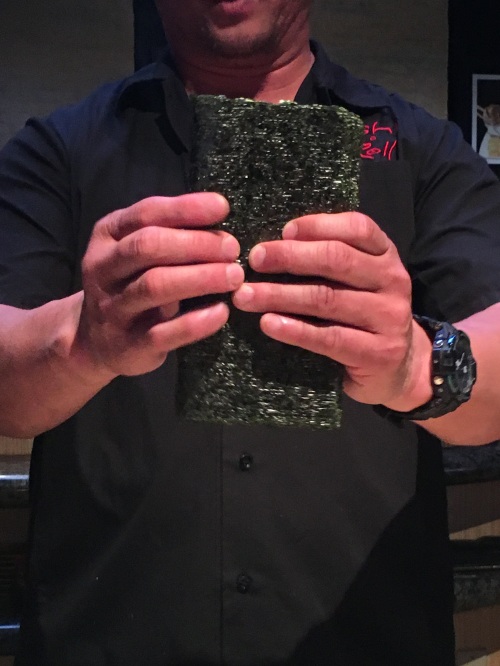
  • Break your seaweed in half long ways to end up with two rectangles.
  • IMG_0312Set the seaweed on your work surface rough side up
  • Wet your hand, and take a baseball size of rice. Smash this evenly across the rough surface of the seaweed roll
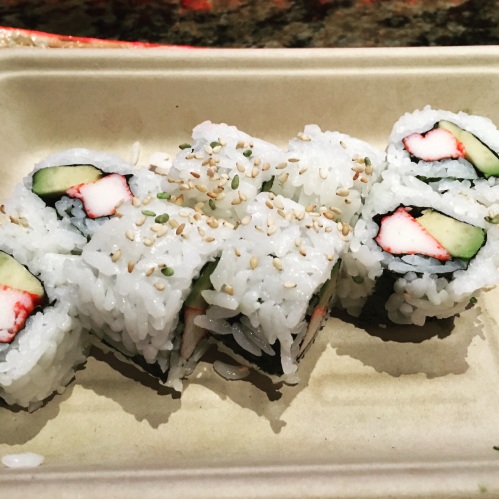
  • Flip over so rice side is on the bottom. Lay your fillings in a narrow row in the middle of the seaweed. For our California Krab Roll we had 2 slices of avocado and 2 spears of krab meat.
  • Using your bamboo mat, start to roll up the sushi roll nice and tight. Press it tightly over the top, then align the sides of the roll with each side of the mat and press to make it even. IMG_0316
  • To cut, dip a sharp, non-serrated knife into water. Cut in half, align halves together, cut in half again, and each half in half to get 8 evenly sized slices. Garnish with toasted sesame seeds.
  • When plating the sushi, turn the end pieces pretty side up. The outer edge will look noticeably different.

IMG_0352

Hubby and I both got kudos on rolling our rolls really tight. We’re on our way to becoming sushi chefs!

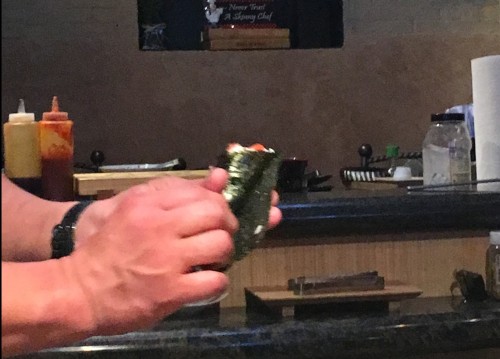
Spicy Tuna Hand Roll

  • Use one wet hand and one dry hand.
  • Place seaweed half in dry hand, rough side facing out.
  • Dip other hand in water, and grab a golfball sized handful of rice. Start in the bottom corner and press rice up in a diagonal.
  • Add a golfball sized handful of spicy tuna mixture (diced tuna and siracha) and align along the inside.
  • Roll up the seaweed on a diagonal. Grab a small bit of rice to use to seal your roll.

IMG_0322Chef Jeff also made for us some shrimp nigiri and albacore sashimi served on a chilled salt block.DSC_0861He also demonstrated how to filet a whole salmon.DSC_0882

DSC_0918

Overall great fun! I look forward to more opportunities to learn more about the beautiful art of making sushi.

*Shout out to my friend Sandy for scheduling and for sharing some great photos!

Leave a comment

Filed under Asian, Review

Orange Bitters

IMG_5699

I found this recipe in Sunset Magazine a few years ago, when they were featuring different ways to infuse alcohols with citrus. We actually made all of the infused alcohols, and had a citrus cocktail party.IMG_5702

If you like to make Manhattans or Old-Fashioneds, give this bitters a try. There’s not a lot of hands on time, and with a little patience you’ll end up with a big batch of delicious bitters that you can package up as gifts for your friends.

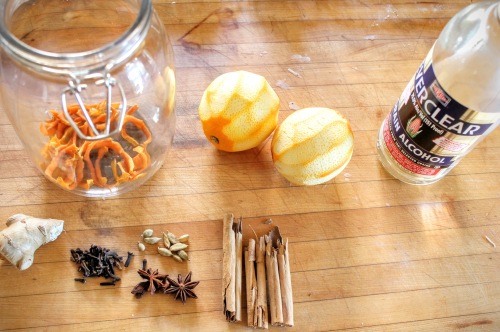
Zest two oranges and dry out the zest in the oven at 250 degrees for about 20 minutes.IMG_5711

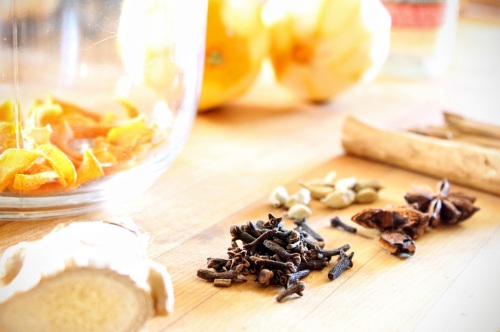
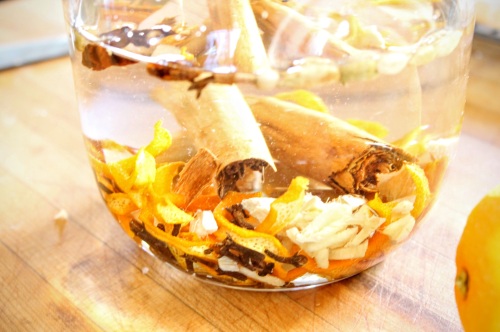
Combine dried out orange zests, cardamom pods, star anise, cinnamon sticks, cloves, and ginger in a jar with the Everclear. Let sit for two weeks.

Strain liquid through cheesecloth into a 1 1/2- to 2-qt. glass jar (save flavorings) and set aside. Put flavorings in a small saucepan with 2 cups water. Cover and bring to a boil, then reduce heat and simmer 10 minutes. Set aside.

Cook sugar in a small saucepan over medium-high heat, lifting and shaking pan occasionally, until sugar caramelizes and turns deep amber, 8 to 10 minutes. Pour caramel into liquid in pan (it will bubble furiously and may firm up). If needed, return pan to medium heat and cook, stirring, for a few minutes until caramel melts again. Set pan in a bowl of ice water until liquid is cold, about 10 minutes. Pour back into your jar, seal and let stand in a dark place 5 days.

IMG_6078

After 5 days, strain the bitters and bottle them in fun smaller bottles that you can give as gifts. And now, make yourself a cocktail!

IMG_6086

Orange Bitters

  • Servings: Four 8 oz bottles
  • Difficulty: Medium
  • Print

Ingredients

2 oranges
1 bottle (750 ml.) Everclear* (grain alcohol)
10 cardamom pods
2 whole star anise pods
3 cinnamon sticks (each 2 1/2 in.)
1 teaspoon whole cloves
1 tablespoon plus 1 tsp. chopped fresh ginger
1 cup sugar

1. Preheat oven to 250°. Remove zest from oranges with a vegetable peeler and put zest on a baking sheet (save fruit for another use). Bake until zest dries, starts to curl up, and begins to brown, 20 to 25 minutes. Let cool.

2. Put all ingredients except sugar in a 1-qt. glass jar and seal tightly. Let sit in a cool, dark place for 2 weeks.

3. Strain liquid through cheesecloth into a 1 1/2- to 2-qt. glass jar (save flavorings) and set aside. Put flavorings in a small saucepan with 2 cups water. Cover and bring to a boil, then reduce heat and simmer 10 minutes. Set aside.

4. Cook sugar in a small saucepan over medium-high heat, lifting and shaking pan occasionally, until sugar caramelizes and turns deep amber, 8 to 10 minutes. Pour caramel into liquid in pan (it will bubble furiously and may firm up). If needed, return pan to medium heat and cook, stirring, for a few minutes until caramel melts again.

5. Set pan in a bowl of ice water until liquid is cold, about 10 minutes. Pour into jar with first infusion. Seal and let stand in a dark place 5 days.

6. Strain final mixture through cheesecloth into a glass measuring cup and discard flavorings. Divide bitters into small jars and seal tightly.

Make ahead: Up to 1 year, chilled.

Leave a comment

Filed under Drink, Recipes

Chocolate Viennese Finger Cookies

IMG_5605
A couple of years ago my Nana gave me two cookie cookbooks for Christmas. She always makes a great collection of cookies this time of the year, and I love that she shares that passion with me. I have been slowly working my way through the books and identifying new favorites. Over the weekend, hubby helped me make these Chocolate Viennese Finger Cookies that we both loved! They are the perfect coffee cookie – which means I have been eating way too many of them with breakfast.IMG_5535

The dough was very easy to make. Combine all of your dry ingredients, beat the butter, sugar, and vanilla, and slowly add in your dry mixture.

IMG_5549

Pipe out the dough into chocolate “fingers.” I actually think you could roll and cut these out, or even drop them onto the cookie sheet. They will look different, and the cooking time might vary slightly, but I think that it would work. Or you could pipe them into rosettes. We tried the “S” shape encouraged in the recipe, but did not have much luck.

IMG_5567

Once the cookies have baked and cooled, dust them with powdered sugar.

IMG_5593

And drizzle them with melted chocolate. A few tips: if your chocolate isn’t very “drizzly” – add a bit of crisco or butter. Also, I found it helpful to move the fork very fast in order to shake the chocolate off of the fork.

IMG_5601

Chocolate Viennese Fingers

  • Servings: 30
  • Difficulty: Medium
  • Print

Recipe:
Vegetable oil for greasing
2 cups all purpose flour
1/3 cup unseated cocoa powder
1/4 cup cornstarch
1 cup unsalted butter, softened
1/2 cup confectioner’s sugar, sifted
1 tsp vanilla extract
confectioner’s sugar for dusting
4 oz bittersweet chocolate melted

Preheat the oven to 350 degrees F. Lightly spray or grease 2 large baking sheets. Sift the flour, cocoa powder, and cornstarch into a medium bowl.
In a large bowl, using an electric mixer, beat the butter and confectioner’s sugar for 1-2 minutes, until light and fluffy. On low speed, gradually beat in the flour mixture and vanilla extract until a soft dough forms.

Spoon the dough into a large pastry bag fitted with a large star tip. Pipe about 24 3-inch fingers or S shapes 2 inches apart on the baking sheets.
Bake for 15-20 minutes, until set and slightly firm when touched with a fingertip, rotating the baking sheets from the top to the bottom shelf and from front to back halfway through the cooking time. Remove the baking sheets to wire racks to cool for about 15 minutes until the cookies are firm. Transfer the cookies to wire racks to cool completely.
Arrange close together on a wire rack and dust with confectioner’s sugar. Drizzle with melted chocolate. Set on wax paper.

1 Comment

Filed under Dessert, Recipes

Soft Pretzels

IMG_5452

I have made these soft pretzels, mostly following Alton Brown’s recipes and tips quite a few times now and every time they are devoured! They are a little bit of a process and time consuming to make, but well worth it if you are in the mood for a project. I highly recommend doubling Alton’s recipe (which is what I have listed below).

First, make the dough. This has to rise for about an hour, until doubled in size.

IMG_5428

Bring a pot of water to a boil, and add in approximately 1/2 cup of baking soda. I recommend using the widest pot that you have. (Warning: you will get baking soda water all over your stove top, but it’s easy to wipe up with a vinegar soaked rag and then everything is clean!) Prepare your baking sheets with greased parchment paper.

Meanwhile, punch down the dough, and divide it into sixteen squares. From here you can shape sixteen large pretzels, thirty two mini pretzels or sticks, or about sixty four pretzel bites – my go to for parties.

IMG_5437

Once you have shaped everything, the water should be boiling. Preheat the oven to 450 degrees. Drop the pretzels one at a time into the boiling water for 30 seconds (if doing sticks, you can do up to five at a time). Use a wide flat spatula to lift them out and set on a cooling rack. Move boiled pretzels to the prepared baking sheets.

IMG_5447

Make an egg wash with 1 egg yolk and 1 Tb water. Brush the top of each pretzel with the egg wash, and sprinkle with salt.
(Variation: you can mix it up and sprinkle the pretzels with Kosher salt, pretzel salt, garlic salt and herbs, or even cinnamon sugar for a sweet taste.)

IMG_5449

Bake pretzels in the oven for 12 minutes until golden brown. Serve with a variety of mustards or cheese sauce. The finished pretzels can also be topped with cheese and put back under the broiler for some pretzel pizzas.

Soft Pretzels

  • Servings: 16-64
  • Difficulty: Medium
  • Print

Ingredients:

3 cups warm (110 to 115 degrees F) water
2 tablespoon sugar
4 teaspoons kosher salt
2 package active dry yeast
44 ounces all-purpose flour, approximately 9 cups
4 ounces unsalted butter, melted
Vegetable oil, for parchment paper
10 cups water
1/2 -2/3 cup baking soda
1 large egg yolk beaten with 1 tablespoon water
Pretzel salt

Directions:
First, make the dough. Combine the water, sugar and kosher salt in the bowl of a stand mixer and sprinkle the yeast on top. Allow to sit for 5 minutes or until the mixture begins to foam. Add the flour and butter and, using the dough hook attachment, mix on low speed until well combined. Change to medium speed and knead until the dough is smooth and pulls away from the side of the bowl, approximately 4 to 5 minutes. Remove the dough from the bowl, clean the bowl and then oil it well with vegetable oil. Return the dough to the bowl, cover with plastic wrap and sit in a warm place for approximately 50 to 55 minutes or until the dough has doubled in size.

Bring a pot of water to a boil, and add in approximately 1/2 cup of baking soda. I recommend using the widest pot that you have. (Warning: you will get baking soda water all over your stove top, but it’s easy to wipe up with a vinegar soaked rag and then everything is clean!) Prepare your baking sheets with greased parchment paper.

Meanwhile, punch down the dough, and divide it into sixteen squares. From here, you can shape sixteen large pretzels, thirty two mini pretzels or sticks, or about sixty four pretzel bites – my go to for parties.

Once you have shaped everything, the water should be boiling. Preheat the oven to CHECK TEMPERATURE. Drop the pretzels one at a time into the boiling water for 30 seconds (if doing sticks, you can do up to five at a time). Use a wide flat spatula to lift them out and set on a cooling rack. Move pretzels to the prepared baking sheets.

Make an egg wash with 1 egg yolk and 1 Tb water. Brush the top of each pretzel with the egg wash, and sprinkle with salt.
(Variation: you can mix it up and sprinkle the pretzels with Kosher salt, pretzel salt, garlic salt and herbs, or even cinnamon sugar for a sweet taste.)

Bake pretzels in the oven for 12 minutes until golden brown. Serve with a variety of mustards or cheese sauce. The finished pretzels can also be topped with cheese and put back under the broiler for some pretzel pizzas.

I’d love to know if you discover a new topping or dip for these delicious soft pretzels. They’re sure to be a hit at your next party.

2 Comments

Filed under Bread, Recipes

Throwback Thursday: Thanksgiving Dishes

In honor of Thanksgiving next week and today being a “throwback Thursday,” I wanted to revisit one of my earliest posts on this blog, from Thanksgiving 2009. I will actually be making this apple pie again this year!


Thanksgiving is always a wonderful, family- and food-filled day in my life.  For as long as I can remember, anywhere from 20-30 people have gathered in my mom’s house for this holiday.  We are a bit ridiculous when it comes to the food: always a selection of appetizers that makes it hard to leave room for dinner, two (or more) turkeys will all of the trimmings, and a variety of pies and cookies to satisfy all.

After starting college, and learning how to make an apple pie without mom’s helping hands (which was hilarious in the dorm kitchen), I’ve been making apple pie for our Thanksgivings using a family recipe. This year, I tried a little decoration on the crust.

Last year was the first year I experimented with a new recipe, and brought a Wild Rice Stuffing with Goat Cheese and Chorizo. As expected, a few select family members loved it, and the large majority were somewhat wary of trying something new.  I’ve been told I like to make “weird” foods by some of the pickier members of my family.

This year, my mom encouraged me to try something new again.  I have been loving squash all season, so I went in search of something featuring Butternut Squash.

I came across this recipe from 101 Cookbooks.  I couldn’t find farro anywhere, so I took this opportunity to try Winter Wheat Berries, which I have been meaning to try for quite a while.  I also planned on substituting the walnuts for hazelnuts, since I have been enjoying those lately.  Unfortunately, I must not have been paying attention at the store because I bought UNSHELLED hazelnuts.  Since I do not have a nutcracker, I’m in a bit of a pickle until I can figure out how to get them out.  So, I substituted pine nuts out of the freezer, which ended up quite nice.  I really liked how the pine nuts were a similar size to the winter wheat berries.

Again, the majority of my family was not inclined to try a new dish, featuring a grain most had not heard of. The adventurous ones told me that it was indeed delicious, and all left overs were taken home.  So, I’ll count that as a success!

Leave a comment

Filed under Dessert, Recipes, Side Dishes

Naan Bread

Nan

Nan is a great accompaniment to any Indian meal.  It is light and airy, and sops up delicious sauces. Pretty easy to make, and you probably have all of the ingredients on hand.

  • 2 c flour
  • 1/2 tsp salt
  • 1/2 oz active dry yeast
  • 4 Tbsp lukewarm milk
  • 1 Tbsp vegetable oil
  • 2 Tbsp plain yogurt
  • 1 egg
  • 2-3 Tbsp melted butter

Sift the flour and salt together into a large bowl. In a smaller bowl, cream the yeast with the milk. Set aside for 15 minutes. Add the yeast and milk mixture, vegetable oil, yogurt, and egg to the flour. Combine the mixture using your hands until it forms a soft dough. Add a little more of the lukewarm water if the dough is too dry. Turn the dough out onto a lightly floured surface and knead for about 10 minutes, or until it feels smooth. Return the dough to the bowl, cover, and let stand in a warm place for about 1 hour, or until it has doubled in size. Preheat oven to highest setting (or just use broiler), and preheat baking sheets. Turn out the dough back onto the floured surface and knead for another 2 minutes. Divide into 3 or 4 equal pices, shape into balls, and roll out into teardrop shapes. Bake on preheated baking sheets 3-4 minutes or until puffed. Place under broiler for a few seconds, until browned slightly. Brush with melted butter and serve warm with saucy dishes.

Leave a comment

Filed under Bread, Indian, Recipes