Tag Archives: recipe

Pan Seared Oven Roasted Steak

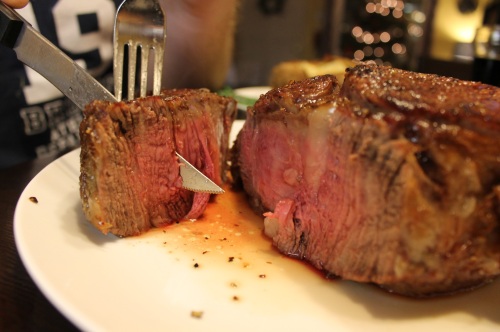
IMG_6044Most years for special occasions like New Year’s Eve, Valentine’s Day, and birthdays hubby and I splurge on getting a really good steak from an actual butcher shop like Siesel’s or Iowa Meat Farms. Our favorite is to get a Delmonico Rib Eye, which still has the bone in, and is available in a double thick cut. One really giant steak to cook to a perfect medium rare, and share between the two of us. It feels fancy, it’s cheaper than going out to a steak house on a crowded night, and we have a lot of fun cooking together. IMG_0081
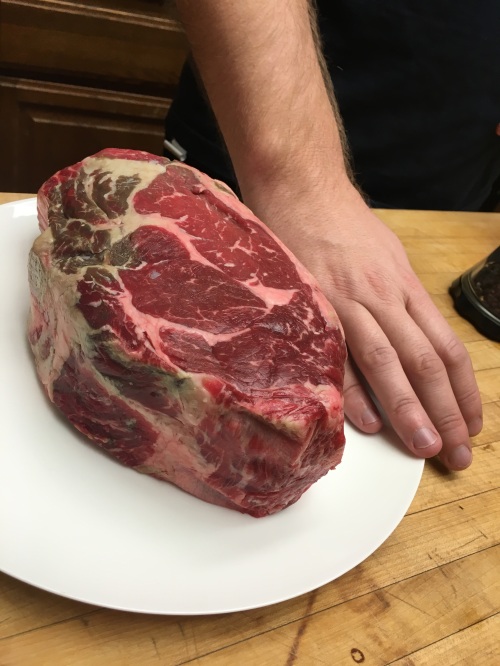
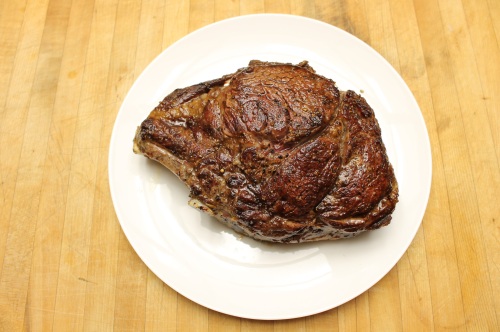
I think we have finally perfected our method for cooking an amazing steak with a crunchy seared exterior, and perfectly tender interior.
IMG_6040

Pan Seared Oven Roasted Steak

  • Servings: 2 (with left overs for steak and eggs)
  • Difficulty: Medium
  • Print

Ingredients:

  • The best steak you can get your hands on
  • Olive oil
  • A well seasoned cast-iron skillet
  • Salt and Pepper

Take your steak out of the fridge at least a half hour before cooking to bring to room temperature. Rub with olive oil, and generously season the steak on all sides with salt and pepper.

Preheat your oven to 500 degrees F.

Heat a well-seasoned cast iron skillet over high heat. Sear your steak on all sides. You may need to hold it upright with tongs to brown the edges. For our double thick steak, we seared it for about 45 seconds per side.

Once the steak is browned on all sides, slide it in the cast iron skillet into your oven. Cook the steak for 2-7 minutes on each side, depending on thickness. (2 minutes per side for a medium rare 1 1/2 inch steak, 7 minutes per side for a 3 inch thick steak)

Let steak rest for about ten minutes before slicing it.


Leave a comment

Filed under Cooking Project, Dinner, Recipes

Stuffed tomatoes

IMG_2617

I love this time of year. It’s usually when our backyard garden is at it’s peak, and my menu planning is guided by a Sunday afternoon harvest. We had a late and rocky start to planting this year due to some unexpected SDGE projects in our yard, and I was worried that we wouldn’t have the success we’ve had in previous summers. Thankfully we’ve got a very powerful “volunteer” tomato that sprouted and has completely taken over a corner. It’s been giving us a handful of tomatoes every week, and this week we got an abundance!

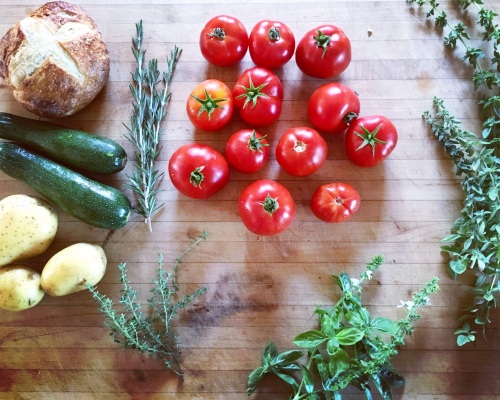
I saw a video online recently for stuffed tomatoes, and was reminded of making stuffed tomatoes in a cooking class in Italy during my study abroad program in 2005. Unfortunately I couldn’t get my hands on that recipe, but between perusing The Silver Spoon and a few online recipes, here’s what we landed on: Plump hollowed out tomatoes stuffed with zucchini, rice, tomatoes and herbs, surrounded by diced tomatoes.

IMG_2633

Stuffed Tomatoes

  • Servings: 4
  • Difficulty: Medium
  • Print

7 tomatoes
1/2 yellow onionIMG_2635 3 garlic cloves
1 zucchini
1/4 cup cooked rice
1/2 lemon
2 small yukon gold potatoes
olive oil
salt and pepper
parmesan cheese optional for finishing
an abundance of italian herbs. I used rosemary, oregano, thyme and basil

Preheat the oven to 400 degrees.

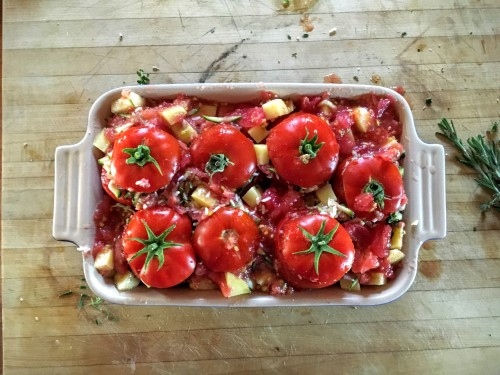
Slice the tops off of the tomatoes and reserve. Using a spoon, hollow out the inside of the tomato, and scoop the flesh into a bowl. If desired, turn the tomatoes upside down and let them drain. I’m not entirely sure of the benefits of this, but I do feel like the sides of my tomatoes held up a bit better. Pulse onion, garlic, 1 tsp olive oil and a pinch salt in a food processor or blender, and dump into a large bowl. Separate tomato flesh chunks from the juice and pulse in the food processor, add to large bowl. Shred zucchini in food processor or with a grater, and add to large bowl. Add rice, lemon juice, a generous pinch of salt, pepper, and chopped herbs to everything in the large bowl. Place the tomatoes into an oiled baking dish. Using a fork to slightly drain the mixture, stuff the hollowed out tomatoes with the zucchini rice mixture.

Dice up the potatoes and toss with salt, pepper, olive oil and herbs. Stuff potatoes all around tomatoes. Pour the remaining tomato juice and any juices from the stuffing mixture over the potatoes.

Bake at 400 degrees for 20 minutes, turn the heat down to 385 degrees and bake for an additional 20 minutes. If desired, finish with a sprinkling of Parmesan cheese before the last 5 minutes of baking.

Serve with a small green salad and some crusty bread, and a nice glass of red wine. Bon appetit!

2 Comments

Filed under cooking, Cooking Project, Dinner, Recipes

Pistachio Ice Cream

image

As we prepare for a hot summer, we are stockpiling our freezer with different flavors of home made ice cream. We received a great ice cream cookbook, Jeni’s Splendid Ice Creams at Home, as a wedding present from some friends who took us to a Jeni’s in Chicago. Since we don’t have one in San Diego, it’s time to make our own.

IMG_2318

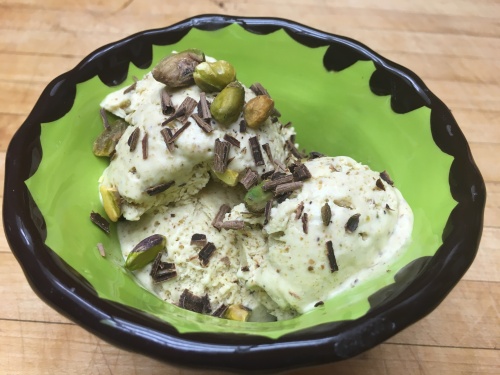
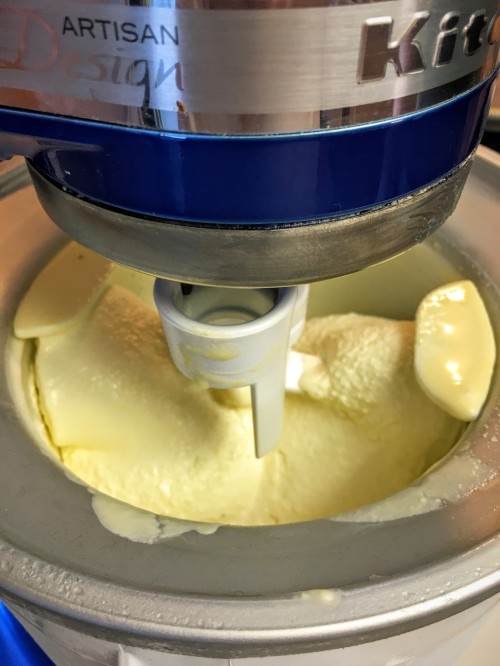
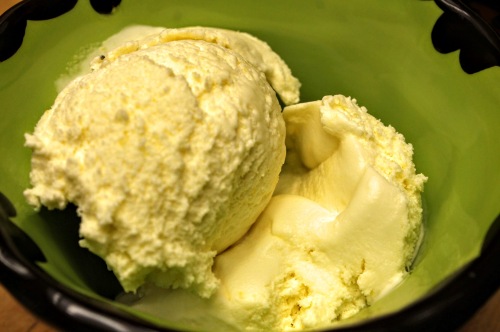
First up, some toasted pistachio ice cream. So rich and nutty, a little bit salty, a little bit tangy from the cream cheese. Most of Jeni’s recipes have a cream cheese base instead of an egg custard base. I can’t get enough.

IMG_2319

As with all homemade ice creams, make sure that your ice cream maker is frozen well in advance of when you want to make ice cream, at least 24 hours. Also, I like to plan to make my base the day before I churn it, to give the cream plenty of time to chill in the fridge.


This ice cream is delicious and very flavorful on its own, but is spectacular with additional toasted pistachios and shaved dark chocolate.

image

Toasted Pistachio Ice Cream

  • Servings: 4 as a side
  • Difficulty: Medium
  • Print

Recipe from Jeni’s Splendid Ice Creams at Home

INGREDIENTS
1/2 cup shelled unsalted pistachios (plus 1/4 cup if you want to add whole ones to your ice cream)
2 cups whole milk
1 tablespoon plus 1 teaspoon cornstarch
1 1/2 ounces (3Tbsp) cream cheese, softened
1/2 tsp fine sea salt
1 1/4 cups heavy cream
2/3 cup sugar
2 Tbsp light corn syrup
1/2 tsp almond extract

Directions:

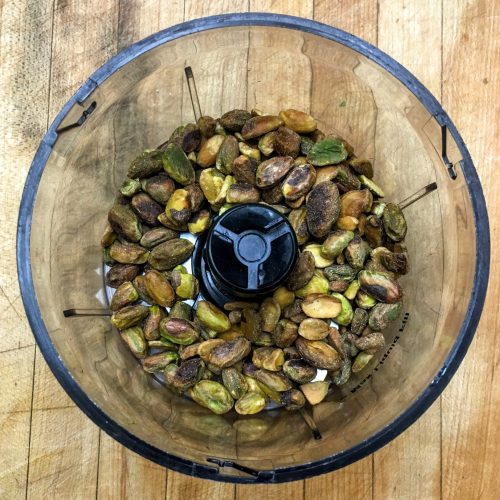
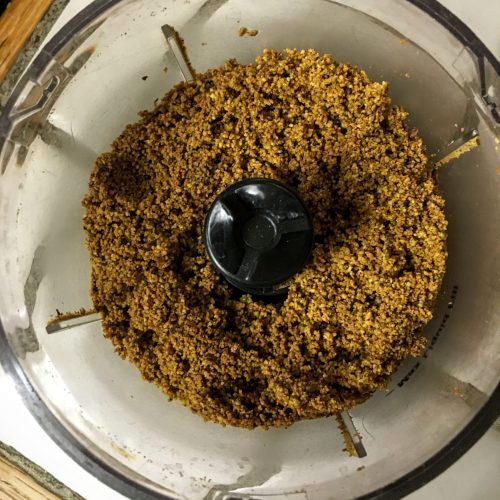
Preheat the oven to 350 degrees. Spread the pistachios out on a small baking sheet and toast in the oven for 10-12 minutes, until fragrant and just starting to brown. Remove from the oven and pulverize 1/2 cup of pistachios in a food processor until the pistachios become a very smooth paste. Add the cream cheese and salt and blend until smooth.
Mix about 2 Tbsp of the milk with the cornstarch in a small bowl to make a smooth slurry and set aside.
Combine the remaining milk, cream, sugar, and corn syrup in a 4-quart saucepan, bring to a rolling boil over medium-high heat, and boil for 4 minutes. Remove from the heat and gradually whisk in the cornstarch slurry.
Bring the mixture back to a boil over medium-high heat, and cook, stirring , until slightly thickened, about 1 minute. Remove from heat.
Gradually whisk the hot milk mixture into the cream cheese mixture until smooth. Chill in an ice bath for 30 minutes, or preferably overnight in the fridge.
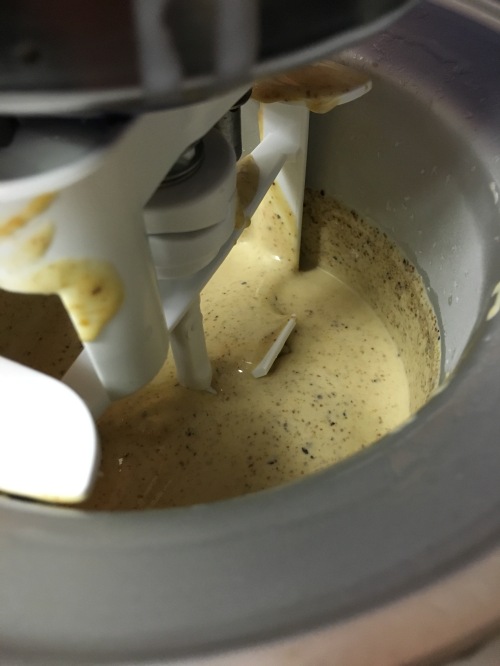
Pour the ice cream base into the frozen canister. Add the almond extract while churning. Follow the directions on your machine, churning until the ice cream is thick and creamy. Package, with or without additional pistachios, and freeze for at least 4 hours before serving.

Leave a comment

Filed under Cooking Project, Dessert, Recipes

Lemon Orange Poppyseed Muffins

IMG_2288

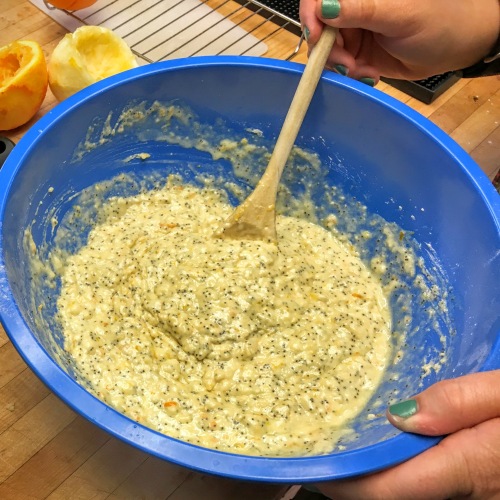
As I’ve mentioned before, Sunday mornings in our house are often for leisurely breakfasts, usually involving a baking project of some kind. This past weekend I really wanted to make some buttermilk muffins as a way to use up some of the buttermilk in my fridge.

IMG_2273

I found myself lacking all of things I usually put into muffins: blueberries (frozen or fresh), other berries, dried fruits, etc. It must be time to go shopping!

IMG_2277
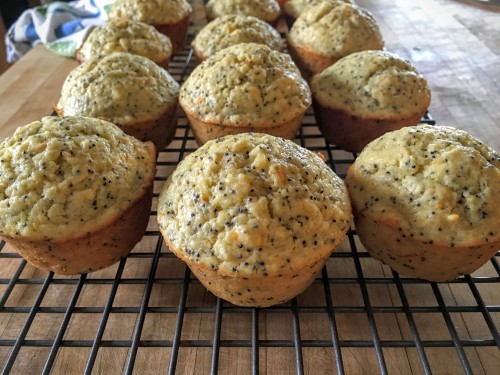
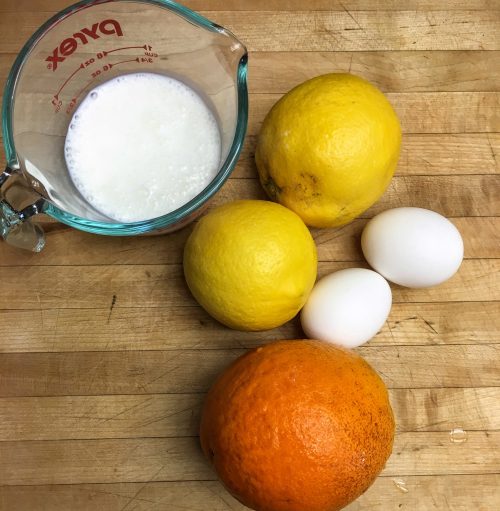
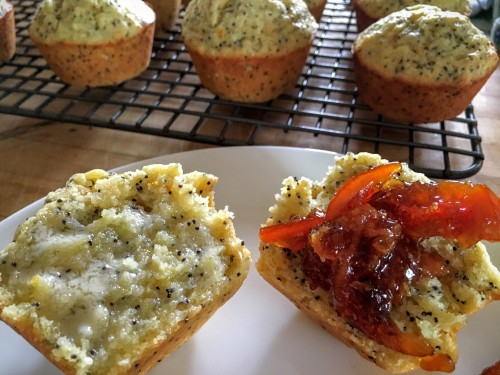
What we did have is a nice supply of meyer lemons and oranges, and some poppyseeds from the spice cupboard. These muffins ended up being so deliciously fresh, with a nice tartness from the citrus and buttermilk. I’m sure I will make these again, more intentionally this time!

IMG_2290

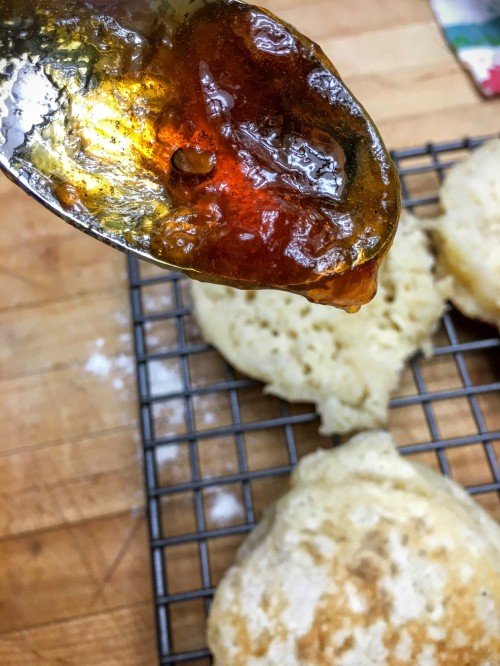
These muffins ended up being a perfect vehicle for our Orange Vanilla Marmalade.

Lemon Orange Poppyseed Muffins

  • Servings: 12
  • Difficulty: Medium
  • Print

Recipe adapted from Sally’s Baking Addiction

INGREDIENTS

2 and 1/3 cups all-purpose flour
1/2 cup granulated sugar
1/4 cup packed light brown sugar
3 Tablespoons poppy seeds
2 teaspoons baking powder
1/4 teaspoon baking soda
1/2 teaspoon salt
1/2 cup salted butter, melted
juice and zest of 2 medium lemons
juice and zest of 1 orange
2 large eggs, at room temperature
1/2 cup buttermilk
1 teaspoon vanilla extract

Directions:

Preheat oven to 425°F. Spray 12-count muffin pan with nonstick spray. Set aside.
In a large bowl, whisk the flour, granulated sugar, brown sugar, poppy seeds, baking powder, baking soda, and salt together until thoroughly mixed. Set aside.
In a medium bowl, whisk the melted butter, lemon juice, lemon zest, orange juice, and orange zest together until combined. (Our citrus was very juicy, so we only used the juice of 1 lemon and 1/2 orange) Add the eggs, one at a time, whisking after each addition. Whisk in the buttermilk and vanilla. Pour the wet ingredients into the dry ingredients and gently mix together until no pockets of flour remain. Do not overmix. The batter is extremely thick.
Spoon the thick batter into the muffin tins, filling them all the way to the top, about 1/4 cup of batter in each. Bake for 5 minutes at 425°F. Keeping the muffins in the oven, reduce oven temperature to 375°F  and continue to bake for 10-13 minutes longer until tops are lightly golden. A toothpick inserted in the center should come out clean. Allow to cool for 10 minutes.

1 Comment

Filed under baking, Breakfast, Recipes

Belgian Waffles

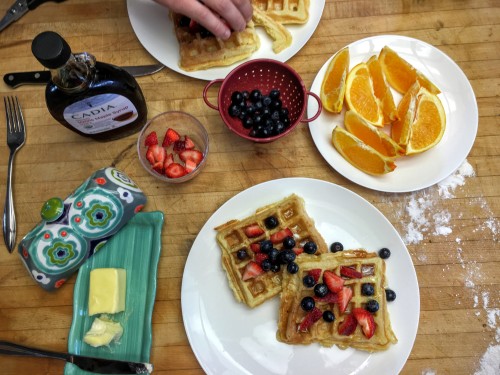
IMG_2038One of our favorite weekend traditions is to have one sleep in day, with a fancy breakfast, home made lattes, and lounge on the couch for an episode of Scandal while we enjoy. A top contender for lazy Sunday breakfast is Belgian Waffles. Our favorite recipe is actually a make ahead yeasted waffle recipe from Ina Garten that I hope to share later, but alas we aren’t always that prepared. This past weekend we tried Emeril Lagasse’s recipe for Belgian Waffles and loved it. You separate the eggs and beat the whites, which really helps to make the batter light and fluffy. A few tips: melt your butter ahead of time and let it cool, and let the eggs and milk come to room temperature. This will help when adding the butter to your liquids if everything is closer to the same temperature.

IMG_2042What are some of your favorite lazy, loungey weekend breakfast recipes?

Belgian Waffles

  • Servings: 4
  • Difficulty: Medium
  • Print

Recipe from Emeril Lagasse

INGREDIENTS
2 cups cake flour
2 teaspoons baking powder
1/2 teaspoon salt
4 large eggs, separated
2 tablespoons sugar
1/2 teaspoon vanilla extract
4 tablespoons unsalted butter, melted
2 cups milk
non-stick cooking spray

DIRECTIONS
Preheat the waffle iron according to the manufacturer’s instructions. In 1 medium bowl sift together flour, baking powder, and salt. Set aside. In a second bowl use the wooden spoon to beat together the egg yolks and sugar until sugar is completely dissolved and eggs have turned a pale yellow. Add the vanilla extract, melted butter, and milk to the eggs and whisk to combine. Combine the liquid mixture with the flour mixture and whisk just until blended. Do not over mix. In third bowl, beat the egg whites with an electric mixer until soft peaks form, about 1 minute. Using the rubber spatula, gently fold the egg whites into the waffle batter. Do not overmix! Coat the waffle iron with non-stick cooking spray and pour enough batter in iron to just cover waffle grid. Close and cook as per manufacturer’s instructions until golden brown, about 2 to 3 minutes. Serve immediately.

2 Comments

Filed under Breakfast, cooking, Recipes

Oven Roasted Salmon over Pasta with Greens

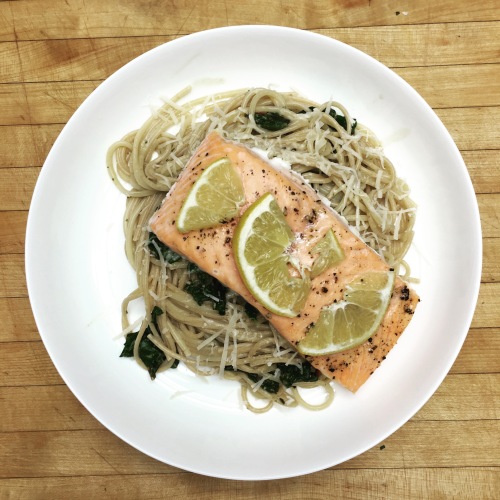
imageA quick and easy weeknight dinner that has a little bit of carby goodness to keep you warm at night, but can easily transition to a light summer meal. Perfect for this time of year.

Also, we’ve got swiss chard growing so happily in the yard that we’ve got to incorporate it into every meal :). Feel free to sub any kind of green.

Oven Roasted Salmon over Pasta with Greens

  • Servings: 2
  • Difficulty: Easy
  • Print

INGREDIENTS
2 fillets of salmon
1 lemon
Extra Virgin Olive Oil
1 bunch swiss chard, ribs removed and chopped
2 servings of pasta
Parmesan cheese to taste
2 Tb prepared pesto

Preheat the oven to 400 degrees. Coat a baking dish with cooking spray. Add the salmon, and season with salt and pepper. Thinly slice a 1/2 a lemon and layer slices over the salmon. Roast in 400 degree oven for 10 minutes, turn the oven to the BROIL setting and broil for 2 additional minutes.

While the salmon is cooking, bring a large pot of water to a boil. Cook the pasta until almost al dente, about 7 minutes. Add the swiss chard and boil for one more minute. Scoop out 1/2 c of cooking water, and drain pasta and chard. Return to the pot.

Mix the 1/c of cooking water with 2 Tb of prepared pesto, and add to the pot of pasta and greens. Add the juice of the remaining 1/2 lemon. Stir to mix well.

Plate up pasta and greens and top with a fair amount of grated parmesan cheese and fresh cracked pepper. Plate your salmon on top and enjoy!

Leave a comment

Filed under cooking, Dinner, Quick Healthy

Crispy Chicken Thighs with Olives and Artichoke

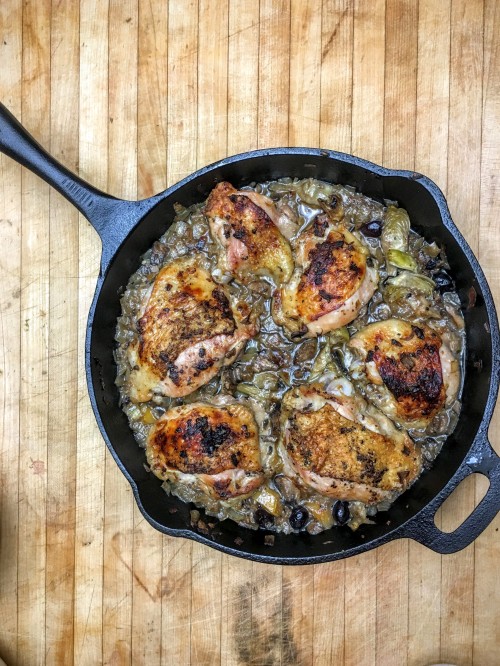
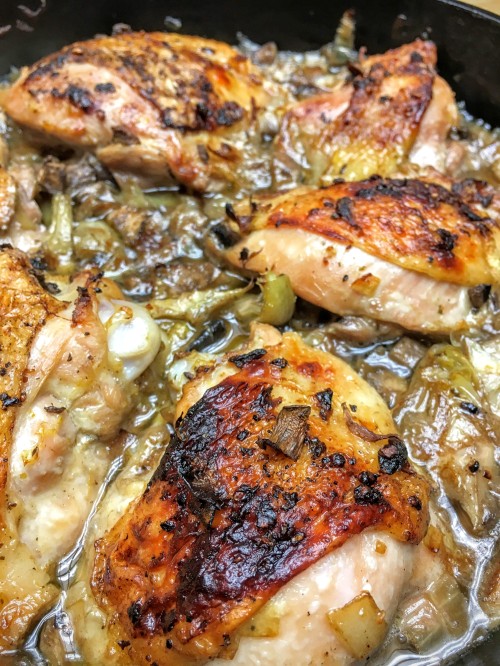
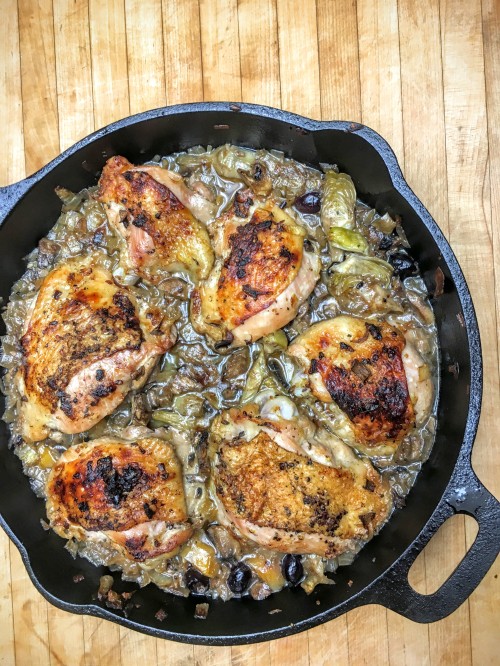
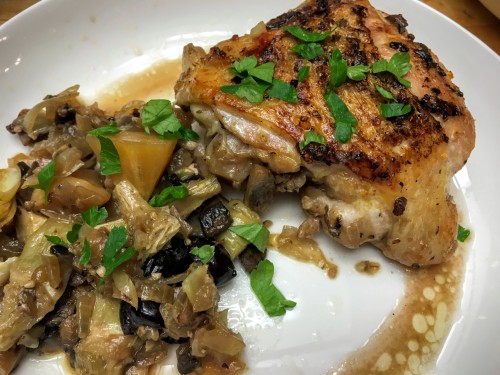
IMG_1183One pot meals are just the greatest, aren’t they? So much flavor and so little clean up. This one is full of Mediterranean flavors of artichokes and olives, and results in a super tender chicken. 
IMG_1181Pretty simple preparation: Sear your bone in-skin on chicken thighs skin side down to get them nice and crispy. Flip them over and fill the pan with veggies, and toss the whole thing in the oven. Dinner is served!IMG_1190Plate this up with some crusty bread and some fresh parsley. Enjoy!IMG_1180
Crispy Chicken Thighs with Olives and Artichoke

  • Servings: 6
  • Difficulty: Easy
  • Print

Adapted from Crispy Chicken Skillet with Artichokes, Beets, Lemon, Olives

INGREDIENTS

1 Tbsp olive oil
1/2 onion, chopped
7 cloves of garlic, peeled and left whole
6 bone in, skin on chicken thighs
Salt, pepper, granulated garlic to taste
Zest from 1 lemon
I cup chicken stock
2 cups chopped mushrooms
8 oz artichoke hearts, chopped
1/3 cup pitted kalamata olives
Juice of 1 lemon

INSTRUCTIONS

Preheat the oven to 425 degrees.
Heat up olive oil in a large cast iron skillet over medium to high heat. Add the onions and garlic to the pan, and sautee for about 10 minutes while you prep the remaining ingredients.
Season the chicken liberally with salt, pepper and granulated garlic on all sides. Place the thighs skin down into the hot skillet, and leave them for 5-7 minutes to develop a nice crispy skin. Flip the chicken thighs and add the remaining ingredients to the skillet.
Allow to simmer for a couple of minutes, and then transfer the whole skillet into the oven to bake for 30 minutes, or until the juices of the thighs run clear and the chicken is cooked through. Finish by squeezing a lemon over the whole dish to brighten up the flavors.

2 Comments

Filed under Dinner, Quick Healthy, Recipes

Orange Cardamom Ice Cream with Candied Orange Peels

IMG_6194

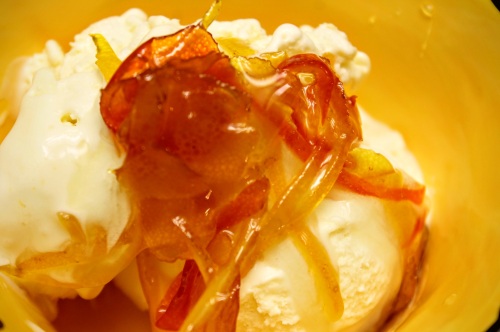
It must be a very robust citrus season in Southern California this year. After making Cranberry Orange Cardamom Scones and Vanilla Orange Marmalade, I’m still looking for ways to use up oranges (in addition to snacking on them all the time). The candied orange peels were a fun way to top a bowl of ice cream, and a tasty snack on their own. IMG_0419Homemade ice cream isn’t too difficult, but it does require planning and patience. The ice cream base has to cool for at least four hours before churning, so I try to plan on making the base the night before I plan on  churning the ice cream. After churning, the ice cream has to freeze for an additional four hours, so it’s best to start the process two days before you want to serve your ice cream. Keeping everything super cold is the best way to get the best texture. IMG_6190

Orange Cardamom Ice Cream with Candied Orange Peels

  • Servings: 2 pints
  • Difficulty: Hard
  • Print

Recipe from “The Perfect Scoop” by David Lebovitz

Ingredients
1 Tbsp cardamom seeds, crushed
1 1/2 c whole milk
1 1/2 c heavy cream
1 c sugar
4 oranges
6 large egg yolks

Preparation
Heat the milk, 1/2 c of the cream, and sugar with the crushed cardamom seeds in a medium saucepan. Zest the oranges directly into the saucepan. Once warm, cover, remove from the heat, and let steep at room temperature for 1 hour.
Rewarm the cardamom infused mixture. Pour the remaining 1 cup heavy cream into a large bowl and set a mesh strainer on top. In a separate medium bowl, whisk together the egg yolks. Slowly pour the warm mixture into the egg yolks, whisking constantly, then scrape the warmed egg yolks back into the saucepan.
Stir the mixture constantly over medium heat with a heatproof spatula, scraping the bottom as you stir, until the mixture thickens and coats the spatula. Pour the custard through the strainer and stir it into the cream. Stir until cool over an ice bath. Chill the mixture thoroughly in the fridge, then freeze it in your ice cream maker according to manufacturer’s instructions.

CANDIED ORANGE PEELS
4 oranges, lemons or grapefruit
2 cups water
1 cup sugar
1 Tbsp light corn syrup
pinch of salt

With a vegetable peeler, remove strips of peel 1 inch wide from the fruit, cutting lengthwise down the fruit. Remove just the colorful outer peel, leaving behind the bitter white pith. Using a very sharp knife, slice the peel lengthwise into very thin strips no wider than a toothpick.
Put the strips of peel in a small, non-reactive saucepan, add enough water to cover them by a few inches, and bring to a boil. Reduce to a gentle boil and cook for 15 minutes. Remove from the heat, strain the peel, and rinse with fresh water.
Combine the 2 cups water, sugar, corn syrup, and salt in the saucepan. Fit the pan with a candy thermometer and bring to a boil. Add the blanched peel, reduce the heat, and cook at a very low boil for about 25 minutes, until the thermometer reads 230 F. Turn off the heat and let the peel cool in the syrup. Once cool, lift the peel out of the syrup with a fork, and serve atop ice cream. Or eat as a snack!
Store the peel in the syrup.

Leave a comment

Filed under Cooking Project, Dessert, Recipes

Bigos: A polish hunter’s stew

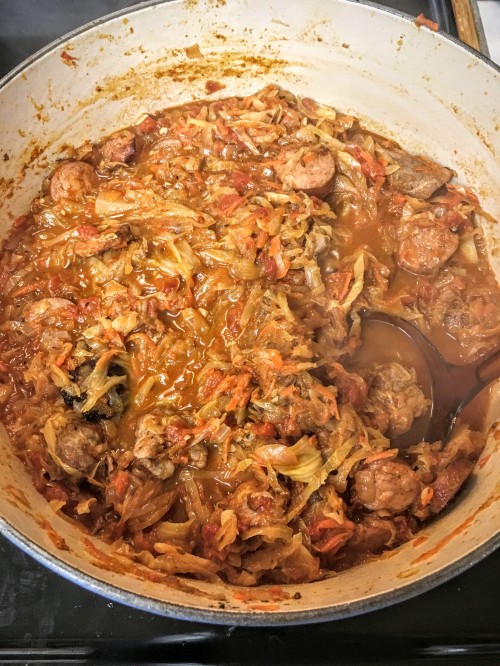
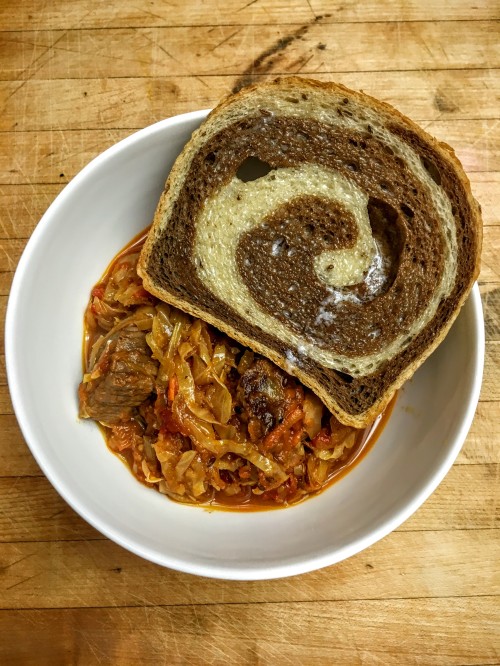
IMG_0643I know spring is happening in other parts of the country and people are craving salads and fresh veggies, but here in San Diego we’re in the middle of a few rainy weekends. If you’re looking for a warm hearty dish to simmer on your stove for an at-home afternoon, try this Bigos: a Polish hunter’s stew.IMG_0645Pretty standard stewing procedure: brown your meat, saute your aromatics in the rendered fat, add meat, veggies, and liquid to the pot and simmer happily away until delicious. This made for an easy week of lazy, comforting dinners.

Bigos

  • Servings: 8-10
  • Difficulty: Easy
  • Print

Adapted from New York Times Cooking

INGREDIENTS

1 pound beef stew meat
Salt and pepper, to taste
Vegetable oil, as needed
1 pound boneless pork shoulder, cut into 1-inch chunks
¾ pound smoked kielbasa, cut into 1/2-inch coins
4 cloves garlic, finely chopped
1 ½ tablespoons whole caraway seed
1 teaspoon ground allspice
1 large onion, sliced 1/4-inch thin
3 medium carrots, grated
32 ounces canned diced tomatoes, with juice
1 pound cabbage, sliced 1/4-inch thin
1 pound sauerkraut
3 bay leaves
Rye bread, for serving.
PREPARATION
Pat the beef very dry with paper towel. Season it with salt and pepper. Over medium-high heat, slick a large, heavy pot with oil. When the oil shimmers, sear the beef in one layer until golden brown, about 2 minutes per side. Remove to a large bowl. Pour off the fat from the pot, add 1/4 cup water and stir to dissolve the browned bits. Pour these juices into the seared meat. Rinse and wipe out the pot, and repeat this process with the pork shoulder.
Place the clean pot over medium heat with a slick of oil. While it heats, add the kielbasa in 1 layer. Brown it until deep golden, about 2 minutes per side. Remove the kielbasa to the seared-meat bowl, but keep the fat in the pot.
Add the garlic and cook, stirring, until fragrant, then add the caraway seed and allspice, and stir for 20 seconds or until very fragrant. Add the onion and a few pinches of salt. Stir to pick up any browned bits; if the bottom of the pot looks dry, add a few splashes of water. Cook the onions, stirring frequently, until soft, about 10 minutes.
Add the carrots, tomatoes, seared meat and juices, and raise the heat to high. When it boils, add the cabbage and sauerkraut. Cook, stirring, until the cabbage is wilted and has released its juices. The liquid should nearly submerge the solids; add water if needed. Bring the pot to a simmer, add the bay leaves, then turn heat down to low to maintain a barely bubbling simmer, and cover the pot, leaving the lid slightly ajar.
Simmer the stew for 2 to 6 hours. At 2 hours, the meat should be tender and the flavor of the bigos will be bright and acidic. At 4 hours, the meat and cabbage will be very tender, with a balanced flavor. (This is my preference.) At 6 hours, which is more traditional, the meat will be falling apart into the cabbage. Adjust seasoning with salt or pepper to taste, and serve with rye bread.

Leave a comment

Filed under Cooking Project, Dinner, Recipes, Soup

Orange Vanilla Marmalade

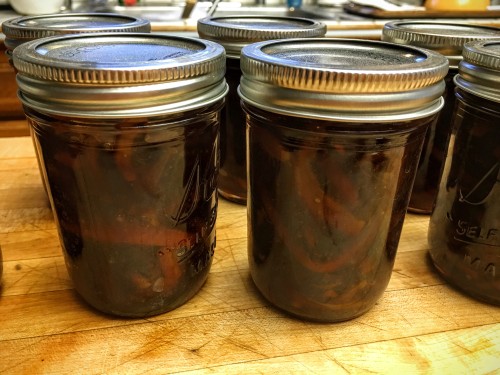
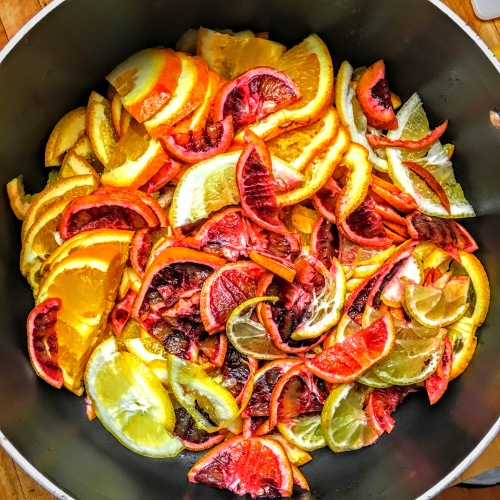
Since I still have so many oranges at home, I decided to make some orange marmalade as a way to use some of them up. In fact, I should make some scones again to eat with this delicious spread.IMG_0639I used half oranges and half blood oranges to make the most beautifully ruby colored orange marmalade that is so far delicious. IMG_0614Inspired by Always Order Dessert, I added two vanilla beans to my marmalade, which is a really fun variation. IMG_0637

Vanilla Orange Marmalade

  • Servings: 8 and a half pints
  • Difficulty: Medium
  • Print

Recipe adapted from Always Order Dessert and Ina Garden.

INGREDIENTS
2 oranges
4 small blood oranges
2 lemons
1 lime
2 vanilla beans
8 cups sugar
8 cups water

Cut the oranges and lemons in half crosswise, then into very thin half-moon slices. Discard any seeds. Place the sliced fruit and their juices into a stainless-steel pot. Add 8 cups water and bring the mixture to a boil, stirring often. Remove from the heat and stir in the sugar until it dissolves. Cover and allow to stand overnight at room temperature.

The next day, bring the mixture back to a boil. Reduce the heat to low and simmer uncovered for about 2 hours. Turn the heat up to medium and boil gently, stirring often, for another 30 minutes. Skim off any foam that forms on the top. Cook the marmalade until it reaches 220 degrees F on a candy thermometer. If you want to be doubly sure it’s ready, place a small amount on a plate and refrigerate it until it’s cool but not cold. If it’s firm — neither runny nor too hard — it’s done. It will be a golden orange color, darker if you also choose to sub in blood oranges. (If the marmalade is runny, continue cooking it and if it’s too hard, add more water.)

Pour the marmalade into clean, hot Mason jars; wipe the rims thoroughly with a clean damp paper towel, and seal with the lids. Process in a hot water bath for ten minutes to seal. Store in the pantry for up to a year.

5 Comments

Filed under Breakfast, Cooking Project, Recipes