Tag Archives: holiday

Pan Seared Oven Roasted Steak

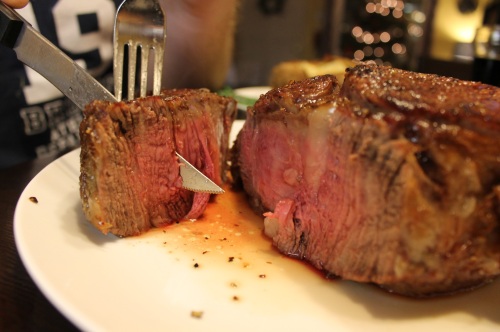
IMG_6044Most years for special occasions like New Year’s Eve, Valentine’s Day, and birthdays hubby and I splurge on getting a really good steak from an actual butcher shop like Siesel’s or Iowa Meat Farms. Our favorite is to get a Delmonico Rib Eye, which still has the bone in, and is available in a double thick cut. One really giant steak to cook to a perfect medium rare, and share between the two of us. It feels fancy, it’s cheaper than going out to a steak house on a crowded night, and we have a lot of fun cooking together. IMG_0081
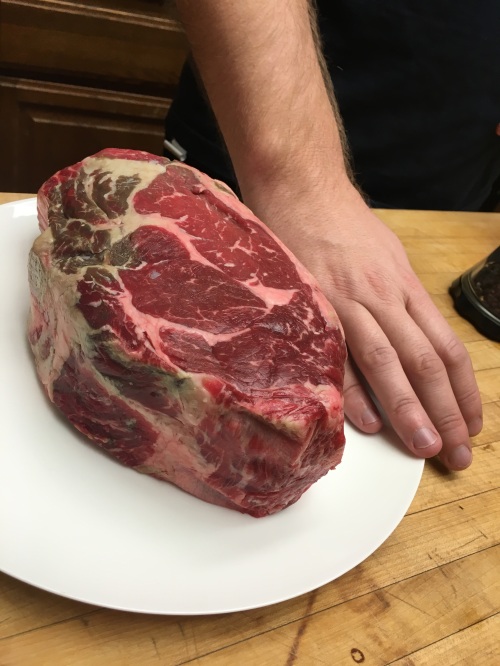
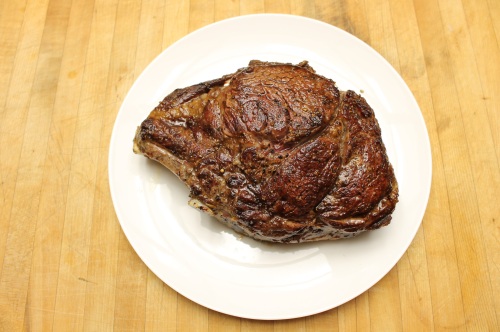
I think we have finally perfected our method for cooking an amazing steak with a crunchy seared exterior, and perfectly tender interior.
IMG_6040

Pan Seared Oven Roasted Steak

  • Servings: 2 (with left overs for steak and eggs)
  • Difficulty: Medium
  • Print

Ingredients:

  • The best steak you can get your hands on
  • Olive oil
  • A well seasoned cast-iron skillet
  • Salt and Pepper

Take your steak out of the fridge at least a half hour before cooking to bring to room temperature. Rub with olive oil, and generously season the steak on all sides with salt and pepper.

Preheat your oven to 500 degrees F.

Heat a well-seasoned cast iron skillet over high heat. Sear your steak on all sides. You may need to hold it upright with tongs to brown the edges. For our double thick steak, we seared it for about 45 seconds per side.

Once the steak is browned on all sides, slide it in the cast iron skillet into your oven. Cook the steak for 2-7 minutes on each side, depending on thickness. (2 minutes per side for a medium rare 1 1/2 inch steak, 7 minutes per side for a 3 inch thick steak)

Let steak rest for about ten minutes before slicing it.


Leave a comment

Filed under Cooking Project, Dinner, Recipes

Orange Bitters

IMG_5699

I found this recipe in Sunset Magazine a few years ago, when they were featuring different ways to infuse alcohols with citrus. We actually made all of the infused alcohols, and had a citrus cocktail party.IMG_5702

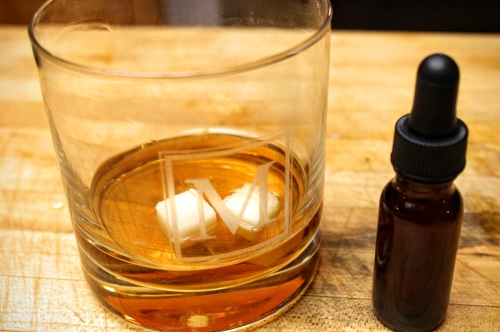
If you like to make Manhattans or Old-Fashioneds, give this bitters a try. There’s not a lot of hands on time, and with a little patience you’ll end up with a big batch of delicious bitters that you can package up as gifts for your friends.

Zest two oranges and dry out the zest in the oven at 250 degrees for about 20 minutes.IMG_5711

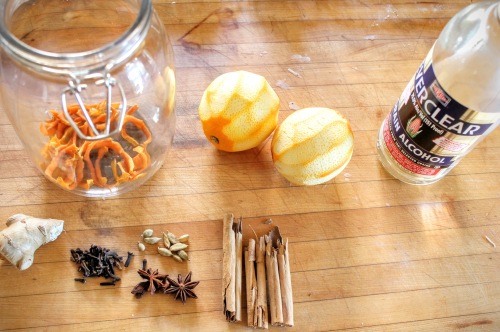
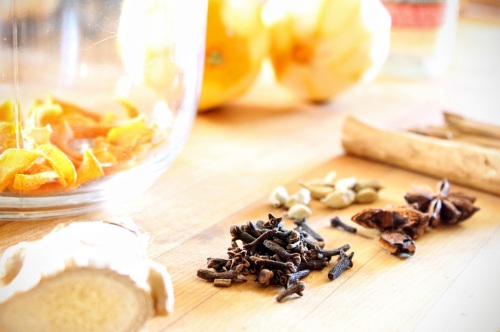
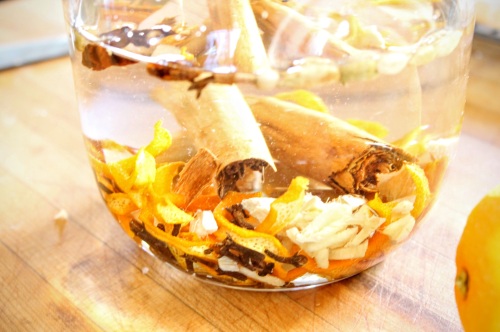
Combine dried out orange zests, cardamom pods, star anise, cinnamon sticks, cloves, and ginger in a jar with the Everclear. Let sit for two weeks.

Strain liquid through cheesecloth into a 1 1/2- to 2-qt. glass jar (save flavorings) and set aside. Put flavorings in a small saucepan with 2 cups water. Cover and bring to a boil, then reduce heat and simmer 10 minutes. Set aside.

Cook sugar in a small saucepan over medium-high heat, lifting and shaking pan occasionally, until sugar caramelizes and turns deep amber, 8 to 10 minutes. Pour caramel into liquid in pan (it will bubble furiously and may firm up). If needed, return pan to medium heat and cook, stirring, for a few minutes until caramel melts again. Set pan in a bowl of ice water until liquid is cold, about 10 minutes. Pour back into your jar, seal and let stand in a dark place 5 days.

IMG_6078

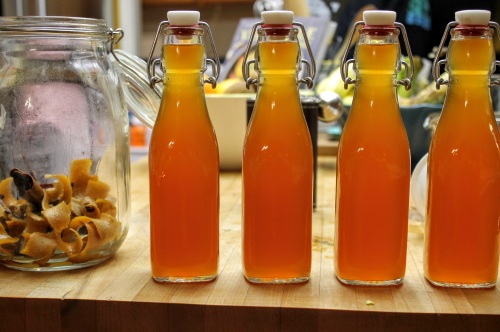
After 5 days, strain the bitters and bottle them in fun smaller bottles that you can give as gifts. And now, make yourself a cocktail!

IMG_6086

Orange Bitters

  • Servings: Four 8 oz bottles
  • Difficulty: Medium
  • Print

Ingredients

2 oranges
1 bottle (750 ml.) Everclear* (grain alcohol)
10 cardamom pods
2 whole star anise pods
3 cinnamon sticks (each 2 1/2 in.)
1 teaspoon whole cloves
1 tablespoon plus 1 tsp. chopped fresh ginger
1 cup sugar

1. Preheat oven to 250°. Remove zest from oranges with a vegetable peeler and put zest on a baking sheet (save fruit for another use). Bake until zest dries, starts to curl up, and begins to brown, 20 to 25 minutes. Let cool.

2. Put all ingredients except sugar in a 1-qt. glass jar and seal tightly. Let sit in a cool, dark place for 2 weeks.

3. Strain liquid through cheesecloth into a 1 1/2- to 2-qt. glass jar (save flavorings) and set aside. Put flavorings in a small saucepan with 2 cups water. Cover and bring to a boil, then reduce heat and simmer 10 minutes. Set aside.

4. Cook sugar in a small saucepan over medium-high heat, lifting and shaking pan occasionally, until sugar caramelizes and turns deep amber, 8 to 10 minutes. Pour caramel into liquid in pan (it will bubble furiously and may firm up). If needed, return pan to medium heat and cook, stirring, for a few minutes until caramel melts again.

5. Set pan in a bowl of ice water until liquid is cold, about 10 minutes. Pour into jar with first infusion. Seal and let stand in a dark place 5 days.

6. Strain final mixture through cheesecloth into a glass measuring cup and discard flavorings. Divide bitters into small jars and seal tightly.

Make ahead: Up to 1 year, chilled.

Leave a comment

Filed under Drink, Recipes

Chocolate Viennese Finger Cookies

IMG_5605
A couple of years ago my Nana gave me two cookie cookbooks for Christmas. She always makes a great collection of cookies this time of the year, and I love that she shares that passion with me. I have been slowly working my way through the books and identifying new favorites. Over the weekend, hubby helped me make these Chocolate Viennese Finger Cookies that we both loved! They are the perfect coffee cookie – which means I have been eating way too many of them with breakfast.IMG_5535

The dough was very easy to make. Combine all of your dry ingredients, beat the butter, sugar, and vanilla, and slowly add in your dry mixture.

IMG_5549

Pipe out the dough into chocolate “fingers.” I actually think you could roll and cut these out, or even drop them onto the cookie sheet. They will look different, and the cooking time might vary slightly, but I think that it would work. Or you could pipe them into rosettes. We tried the “S” shape encouraged in the recipe, but did not have much luck.

IMG_5567

Once the cookies have baked and cooled, dust them with powdered sugar.

IMG_5593

And drizzle them with melted chocolate. A few tips: if your chocolate isn’t very “drizzly” – add a bit of crisco or butter. Also, I found it helpful to move the fork very fast in order to shake the chocolate off of the fork.

IMG_5601

Chocolate Viennese Fingers

  • Servings: 30
  • Difficulty: Medium
  • Print

Recipe:
Vegetable oil for greasing
2 cups all purpose flour
1/3 cup unseated cocoa powder
1/4 cup cornstarch
1 cup unsalted butter, softened
1/2 cup confectioner’s sugar, sifted
1 tsp vanilla extract
confectioner’s sugar for dusting
4 oz bittersweet chocolate melted

Preheat the oven to 350 degrees F. Lightly spray or grease 2 large baking sheets. Sift the flour, cocoa powder, and cornstarch into a medium bowl.
In a large bowl, using an electric mixer, beat the butter and confectioner’s sugar for 1-2 minutes, until light and fluffy. On low speed, gradually beat in the flour mixture and vanilla extract until a soft dough forms.

Spoon the dough into a large pastry bag fitted with a large star tip. Pipe about 24 3-inch fingers or S shapes 2 inches apart on the baking sheets.
Bake for 15-20 minutes, until set and slightly firm when touched with a fingertip, rotating the baking sheets from the top to the bottom shelf and from front to back halfway through the cooking time. Remove the baking sheets to wire racks to cool for about 15 minutes until the cookies are firm. Transfer the cookies to wire racks to cool completely.
Arrange close together on a wire rack and dust with confectioner’s sugar. Drizzle with melted chocolate. Set on wax paper.

1 Comment

Filed under Dessert, Recipes

Throwback Thursday: Thanksgiving Dishes

In honor of Thanksgiving next week and today being a “throwback Thursday,” I wanted to revisit one of my earliest posts on this blog, from Thanksgiving 2009. I will actually be making this apple pie again this year!


Thanksgiving is always a wonderful, family- and food-filled day in my life.  For as long as I can remember, anywhere from 20-30 people have gathered in my mom’s house for this holiday.  We are a bit ridiculous when it comes to the food: always a selection of appetizers that makes it hard to leave room for dinner, two (or more) turkeys will all of the trimmings, and a variety of pies and cookies to satisfy all.

After starting college, and learning how to make an apple pie without mom’s helping hands (which was hilarious in the dorm kitchen), I’ve been making apple pie for our Thanksgivings using a family recipe. This year, I tried a little decoration on the crust.

Last year was the first year I experimented with a new recipe, and brought a Wild Rice Stuffing with Goat Cheese and Chorizo. As expected, a few select family members loved it, and the large majority were somewhat wary of trying something new.  I’ve been told I like to make “weird” foods by some of the pickier members of my family.

This year, my mom encouraged me to try something new again.  I have been loving squash all season, so I went in search of something featuring Butternut Squash.

I came across this recipe from 101 Cookbooks.  I couldn’t find farro anywhere, so I took this opportunity to try Winter Wheat Berries, which I have been meaning to try for quite a while.  I also planned on substituting the walnuts for hazelnuts, since I have been enjoying those lately.  Unfortunately, I must not have been paying attention at the store because I bought UNSHELLED hazelnuts.  Since I do not have a nutcracker, I’m in a bit of a pickle until I can figure out how to get them out.  So, I substituted pine nuts out of the freezer, which ended up quite nice.  I really liked how the pine nuts were a similar size to the winter wheat berries.

Again, the majority of my family was not inclined to try a new dish, featuring a grain most had not heard of. The adventurous ones told me that it was indeed delicious, and all left overs were taken home.  So, I’ll count that as a success!

Leave a comment

Filed under Dessert, Recipes, Side Dishes

Christmas Cookies!

This past weekend was “December Nights” in Balboa Park.  For those of you not from San Diego, it is essentially a two-night community holiday party in the park, with museums giving the gift of free admission each night.  At SDNHM, our volunteers were having a bake sale.  I jumped at the opportunity to make 3 different kinds of cookies, and NOT have them laying around my house tempting me.

Randy came over on Thursday night to help me make the cookies.  We searched through a cookbook my Nana gave me a few years ago that is entirely dedicated to cookies, and decided on Coconut Macaroons with Macadamia Nuts and Cranberry-Nut Pinwheels.  I was very excited to try the Cranberry-Nut Pinwheels because of the nice Christmasy red color that swirled through them.

Coconut Macaroons

To round it out we made some Seven Layer Bars. Graham cracker crust, chocolate chips, butterscotch chips, toasted coconut, peanuts, all topped with sweetened condensed milk. So good!

Seven Layer Bars

We made the dough for the Cranberry-Nut Pinwheels, but I waited to bake them at the Museum, hoping that the smell of fresh baked cookies would waft from the kitchen into the atrium, and persuade more people to buy cookies.  Sadly, that didn’t work.  The cookies did turn out delicious.  Next time I will make more of the cranberry filling, because they could have used a bit more.

Bake Sale Table

When I checked at the end of the night, all but one bag of my cookies had been sold!

Leave a comment

Filed under Dessert

Thanksgiving Dishes

Thanksgiving is always a wonderful, family- and food-filled day in my life.  For as long as I can remember, anywhere from 20-30 people have gathered in my mom’s house for this holiday.  We are a bit ridiculous when it comes to the food: always a selection of appetizers that makes it hard to leave room for dinner, two (or more) turkeys will all of the trimmings, and a variety of pies and cookies to satisfy all.

After starting college, and learning how to make an apple pie without mom’s helping hands (which was hilarious in the dorm kitchen), I’ve been making apple pie for our Thanksgivings using a family recipe. This year, I tried a little decoration on the crust.

Last year was the first year I experimented with a new recipe, and brought a Wild Rice Stuffing with Goat Cheese and Chorizo. As expected, a few select family members loved it, and the large majority were somewhat wary of trying something new.  I’ve been told I like to make “weird” foods by some of the pickier members of my family.

This year, my mom encouraged me to try something new again.  I have been loving squash all season, so I went in search of something featuring Butternut Squash.

I came across this recipe from 101 Cookbooks.  I couldn’t find farro anywhere, so I took this opportunity to try Winter Wheat Berries, which I have been meaning to try for quite a while.  I also planned on substituting the walnuts for hazelnuts, since I have been enjoying those lately.  Unfortunately, I must not have been paying attention at the store because I bought UNSHELLED hazelnuts.  Since I do not have a nutcracker, I’m in a bit of a pickle until I can figure out how to get them out.  So, I substituted pine nuts out of the freezer, which ended up quite nice.  I really liked how the pine nuts were a similar size to the winter wheat berries.

Again, the majority of my family was not inclined to try a new dish, featuring a grain most had not heard of. The adventurous ones told me that it was indeed delicious, and all left overs were taken home.  So, I’ll count that as a success!

1 Comment

Filed under Dessert, Recipes, Side Dishes