Tag Archives: Dinner

Pan Seared Oven Roasted Steak

IMG_6044Most years for special occasions like New Year’s Eve, Valentine’s Day, and birthdays hubby and I splurge on getting a really good steak from an actual butcher shop like Siesel’s or Iowa Meat Farms. Our favorite is to get a Delmonico Rib Eye, which still has the bone in, and is available in a double thick cut. One really giant steak to cook to a perfect medium rare, and share between the two of us. It feels fancy, it’s cheaper than going out to a steak house on a crowded night, and we have a lot of fun cooking together. IMG_0081

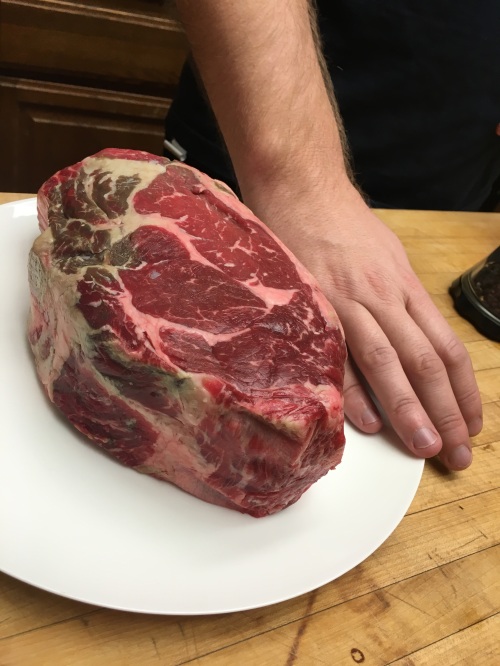
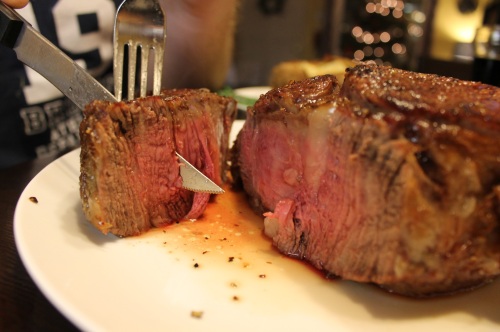
I think we have finally perfected our method for cooking an amazing steak with a crunchy seared exterior, and perfectly tender interior.

IMG_6040

Pan Seared Oven Roasted Steak

  • Servings: 2 (with left overs for steak and eggs)
  • Difficulty: Medium
  • Print

Ingredients:

  • The best steak you can get your hands on
  • Olive oil
  • A well seasoned cast-iron skillet
  • Salt and Pepper

Take your steak out of the fridge at least a half hour before cooking to bring to room temperature. Rub with olive oil, and generously season the steak on all sides with salt and pepper.

Preheat your oven to 500 degrees F.

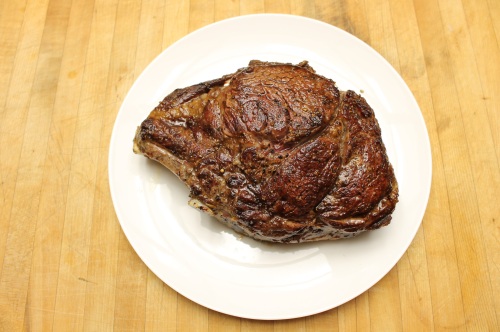
Heat a well-seasoned cast iron skillet over high heat. Sear your steak on all sides. You may need to hold it upright with tongs to brown the edges. For our double thick steak, we seared it for about 45 seconds per side.

Once the steak is browned on all sides, slide it in the cast iron skillet into your oven. Cook the steak for 2-7 minutes on each side, depending on thickness. (2 minutes per side for a medium rare 1 1/2 inch steak, 7 minutes per side for a 3 inch thick steak)

Let steak rest for about ten minutes before slicing it.


Leave a comment

Filed under Cooking Project, Dinner, Recipes

Stuffed tomatoes

IMG_2617

I love this time of year. It’s usually when our backyard garden is at it’s peak, and my menu planning is guided by a Sunday afternoon harvest. We had a late and rocky start to planting this year due to some unexpected SDGE projects in our yard, and I was worried that we wouldn’t have the success we’ve had in previous summers. Thankfully we’ve got a very powerful “volunteer” tomato that sprouted and has completely taken over a corner. It’s been giving us a handful of tomatoes every week, and this week we got an abundance!

I saw a video online recently for stuffed tomatoes, and was reminded of making stuffed tomatoes in a cooking class in Italy during my study abroad program in 2005. Unfortunately I couldn’t get my hands on that recipe, but between perusing The Silver Spoon and a few online recipes, here’s what we landed on: Plump hollowed out tomatoes stuffed with zucchini, rice, tomatoes and herbs, surrounded by diced tomatoes.

IMG_2633

Stuffed Tomatoes

  • Servings: 4
  • Difficulty: Medium
  • Print

7 tomatoes
1/2 yellow onionIMG_2635 3 garlic cloves
1 zucchini
1/4 cup cooked rice
1/2 lemon
2 small yukon gold potatoes
olive oil
salt and pepper
parmesan cheese optional for finishing
an abundance of italian herbs. I used rosemary, oregano, thyme and basil

Preheat the oven to 400 degrees.

Slice the tops off of the tomatoes and reserve. Using a spoon, hollow out the inside of the tomato, and scoop the flesh into a bowl. If desired, turn the tomatoes upside down and let them drain. I’m not entirely sure of the benefits of this, but I do feel like the sides of my tomatoes held up a bit better. Pulse onion, garlic, 1 tsp olive oil and a pinch salt in a food processor or blender, and dump into a large bowl. Separate tomato flesh chunks from the juice and pulse in the food processor, add to large bowl. Shred zucchini in food processor or with a grater, and add to large bowl. Add rice, lemon juice, a generous pinch of salt, pepper, and chopped herbs to everything in the large bowl. Place the tomatoes into an oiled baking dish. Using a fork to slightly drain the mixture, stuff the hollowed out tomatoes with the zucchini rice mixture.

Dice up the potatoes and toss with salt, pepper, olive oil and herbs. Stuff potatoes all around tomatoes. Pour the remaining tomato juice and any juices from the stuffing mixture over the potatoes.

Bake at 400 degrees for 20 minutes, turn the heat down to 385 degrees and bake for an additional 20 minutes. If desired, finish with a sprinkling of Parmesan cheese before the last 5 minutes of baking.

Serve with a small green salad and some crusty bread, and a nice glass of red wine. Bon appetit!

2 Comments

Filed under cooking, Cooking Project, Dinner, Recipes

Oven Roasted Salmon over Pasta with Greens

imageA quick and easy weeknight dinner that has a little bit of carby goodness to keep you warm at night, but can easily transition to a light summer meal. Perfect for this time of year.

Also, we’ve got swiss chard growing so happily in the yard that we’ve got to incorporate it into every meal :). Feel free to sub any kind of green.

Oven Roasted Salmon over Pasta with Greens

  • Servings: 2
  • Difficulty: Easy
  • Print

INGREDIENTS
2 fillets of salmon
1 lemon
Extra Virgin Olive Oil
1 bunch swiss chard, ribs removed and chopped
2 servings of pasta
Parmesan cheese to taste
2 Tb prepared pesto

Preheat the oven to 400 degrees. Coat a baking dish with cooking spray. Add the salmon, and season with salt and pepper. Thinly slice a 1/2 a lemon and layer slices over the salmon. Roast in 400 degree oven for 10 minutes, turn the oven to the BROIL setting and broil for 2 additional minutes.

While the salmon is cooking, bring a large pot of water to a boil. Cook the pasta until almost al dente, about 7 minutes. Add the swiss chard and boil for one more minute. Scoop out 1/2 c of cooking water, and drain pasta and chard. Return to the pot.

Mix the 1/c of cooking water with 2 Tb of prepared pesto, and add to the pot of pasta and greens. Add the juice of the remaining 1/2 lemon. Stir to mix well.

Plate up pasta and greens and top with a fair amount of grated parmesan cheese and fresh cracked pepper. Plate your salmon on top and enjoy!

Leave a comment

Filed under cooking, Dinner, Quick Healthy

Crispy Chicken Thighs with Olives and Artichoke

IMG_1183One pot meals are just the greatest, aren’t they? So much flavor and so little clean up. This one is full of Mediterranean flavors of artichokes and olives, and results in a super tender chicken. 
IMG_1181
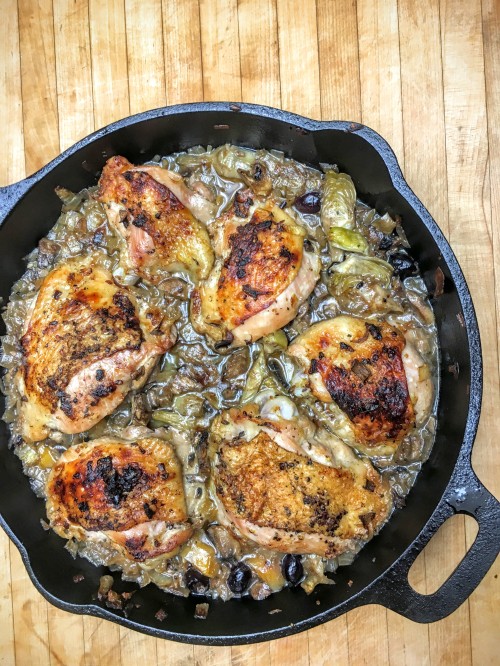
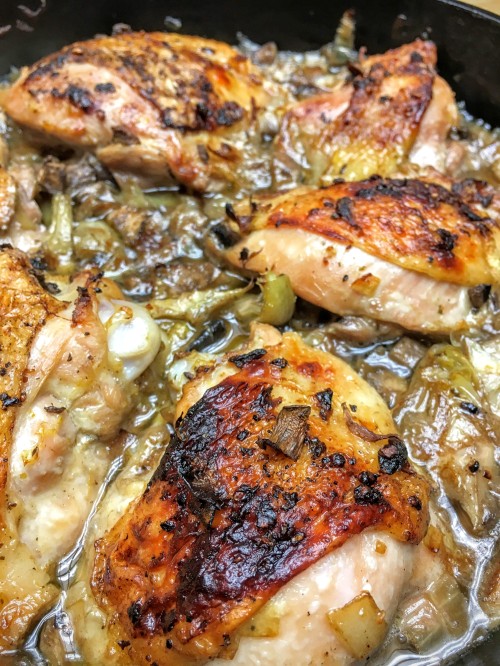
Pretty simple preparation: Sear your bone in-skin on chicken thighs skin side down to get them nice and crispy. Flip them over and fill the pan with veggies, and toss the whole thing in the oven. Dinner is served!IMG_1190Plate this up with some crusty bread and some fresh parsley. Enjoy!IMG_1180

Crispy Chicken Thighs with Olives and Artichoke

  • Servings: 6
  • Difficulty: Easy
  • Print

Adapted from Crispy Chicken Skillet with Artichokes, Beets, Lemon, Olives

INGREDIENTS

1 Tbsp olive oil
1/2 onion, chopped
7 cloves of garlic, peeled and left whole
6 bone in, skin on chicken thighs
Salt, pepper, granulated garlic to taste
Zest from 1 lemon
I cup chicken stock
2 cups chopped mushrooms
8 oz artichoke hearts, chopped
1/3 cup pitted kalamata olives
Juice of 1 lemon

INSTRUCTIONS

Preheat the oven to 425 degrees.
Heat up olive oil in a large cast iron skillet over medium to high heat. Add the onions and garlic to the pan, and sautee for about 10 minutes while you prep the remaining ingredients.
Season the chicken liberally with salt, pepper and granulated garlic on all sides. Place the thighs skin down into the hot skillet, and leave them for 5-7 minutes to develop a nice crispy skin. Flip the chicken thighs and add the remaining ingredients to the skillet.
Allow to simmer for a couple of minutes, and then transfer the whole skillet into the oven to bake for 30 minutes, or until the juices of the thighs run clear and the chicken is cooked through. Finish by squeezing a lemon over the whole dish to brighten up the flavors.

2 Comments

Filed under Dinner, Quick Healthy, Recipes

Ribs!

IMG_0821One of our favorite things to do on a weekend is have a “cooking project day.” This past weekend a Sunday with no plans, and a ribs on sale at the market led to a rib-centered cooking project day. It was perfect to play around with a spice rub, slow cook the ribs while we did some garden projects, and enjoy a tasty meal in our clean backyard.
IMG_6488We’ve done dry rubbed ribs in the oven once before, and this time set out to actually document what went in the dry rub. We looked at a few different recipes, and went off of a tiny jar of the last batch we made, tasting and adjusting along the way. Most important is to find your preferred balance between sweet (brown sugar), spicy and salty. The rub was so good I couldn’t help but sneak little tastes along the way. IMG_6497Rub up those ribs, covering every available inch of space in spices. IMG_6521
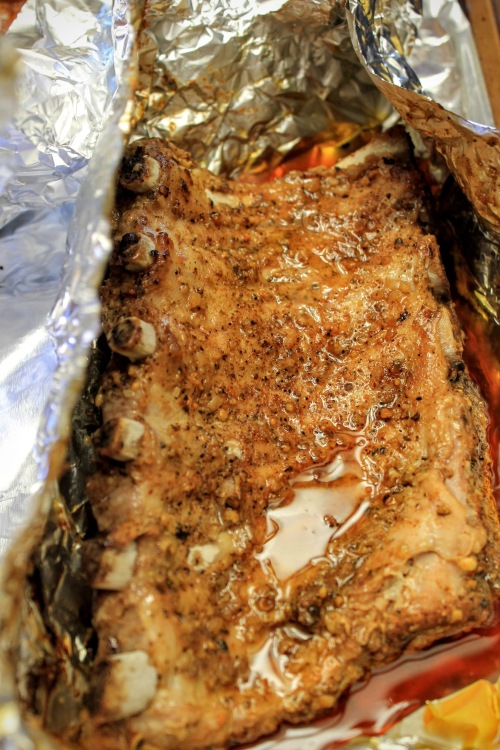
Slow roast in a 250 degree oven for two and a half hours while you go about your at home projects, baste with a “mop” sauce and roast for another half hour at 300 degrees. Finish off with a broil at the end to crisp up the crust. IMG_6528The mop sauce we made was a bit too tart for my taste, so we added some of the juices from the ribs and the rest of the spice rub, and simmered it down into a tasty sauce.IMG_6530

AMAZING!

Dry Rubbed Oven Roasted Ribs

  • Servings: 2 half racks
  • Difficulty: Medium
  • Print

DRY RUB
(for two half rack baby back ribs)
2 Tb brown sugar
1 tsp paprika
1/2 tsp chili powder
1/2 tsp cayenne
1 1/2 tsp garlic salt
1 tsp black pepper
1 tsp dried onion
1/2 tsp smoked salt

2 half rack baby back ribs

MOP SAUCE
3 Tb Mustard (or 2 TB dry mustard and 3 TB water if you find yourself out of yellow mustard like myself)
12 Tb apple cider vinegar
1 Tb honey

Take the ribs out of the fridge and mix all of the dry rub ingredients together. Rub the ribs all over with the dry rub. Pack as much on as you can, and don’t forget about the sides. Do this part early in the day so the flavors have a chance to permeate the meat. Wrap the ribs in foil, and put them back in the fridge until you are ready to start slow roasting them. Place the foil wrapped ribs on a baking sheet and roast in the oven at 250 degrees for approximately two and a half hours. Meanwhile mix together the ingredients for the mop sauce and set aside.
After two and a half hours, take the ribs out of the oven. Collect the juices from the meat to simmer down into a sauce. Baste the ribs, bone side up, with the mop sauce and put back into the oven at 300 degrees for 30 minutes. Baste the ribs again, meat side up with the mop sauce and put back into the oven HOW LONG. Baste the ribs again and broil about 5 minutes on each side to crisp them up.

Boil 1/3 c of the mop sauce with the juice from the ribs, and any left over spice rub to make a delicious sauce.

And, if your interested, some pics of the garden after a day of planting:IMG_0815 IMG_0823

1 Comment

Filed under cooking, Cooking Project, Dinner, Garden, Recipes